Clearing Your Browser Cache
Your browser cache is storage of temporary internet files to speed up page load time when visiting sites on the internet. When you visit a web page, your browser will load a cached version of that page (including HTML, CSS, images, etc.) so that it loads quicker the next time you visit the same page. While this is great for speeding up web browsing, this can be a problem if you're making edits to your website but still viewing a cached version of a page.
Usually, refreshing the page in your browser will update the page so you can see your changes. If that doesn't work, the next step is to clear your browser's cache so that you can be sure you are viewing the most up to date version of the page.
We've included the steps to do this in the major common browsers below. If you're unsure which version you're running, in most browsers you can view this information by clicking Help in the menu bar and then About.
Note: While we provide instructions for clearing browser cache for some older versions of browsers, it's best to update your browser and run the most current version of whichever browser you choose to use.
 Firefox

- Open Firefox.
- Click "Tools" in the Menu bar and select "Clear Recent History." If you do not see the menu bar, simply hit the Alt key on your keyboard to view the menu bar in Firefox.
- Choose "Everything" from the "Time range to clear" drop down.
- Under "Details", only select "Cache" and click the "Clear Now" button.
 Chrome
- Open Chrome.
- Click the wrench icon in the upper right of the window.
- Select Tools > Clear browsing data from the dropdown menu.
- Choose "the beginning of time" at the top of the "Clear Browsing Data" window.
- Check the items you want to clear information for ("Empty the cache" and "Delete cookies..." should be sufficient).
- Click the "Clear browsing data" button to confirm.
 Microsoft Internet Explorer 8 and 9
- Open Internet Explorer.
- If you have selected the Menu Bar viewable, click Tools. Alternatively, click on the Gear icon in the right corner of the browser.
- Select Internet Options and choose the General tab.
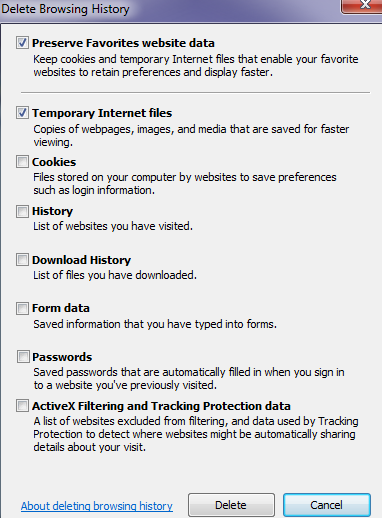
- Click the Delete... button under the "Browsing History" section.
- Uncheck "Preserve Favorites Website Data" at the top of this window.
- If you have passwords saved to your browser, you can leave the box beside "Passwords" unchecked, but be sure to select all the other boxes in the list.
- Click the Delete button.
- Click OK to close window.
 Microsoft Internet Explorer 7
- Open Internet Explorer.
- Click "Tools" in the upper toolbar or click on the Tools icon.
- Select "Delete Browsing History" from the dropdown menu.
- Click the "Delete Files" button beside "Temporary Internet Files".
- When prompted, click Yes to delete all temporary Internet Explorer files.
- Click the "Close" button to close the Delete Browsing History window.
 Microsoft Internet Explorer 6
- Open Internet Explorer.
- Click "Tools" on the menu bar .
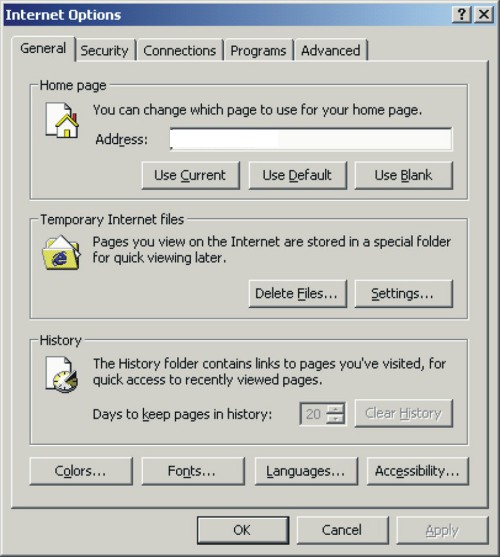
- Select Internet Options in the dropdown menu.
- On the General tab, under "Temporary Internet Files" click the Delete Files... button.
- Check the box next to "Delete all offline content" and click the "OK" button.
- When you are returned to the "Internet Options" window, click "OK" to close the window.
 Safari (for Windows) 4.0 & Up
- Open Safari.
- Click on the Gear icon upper right of the browser.
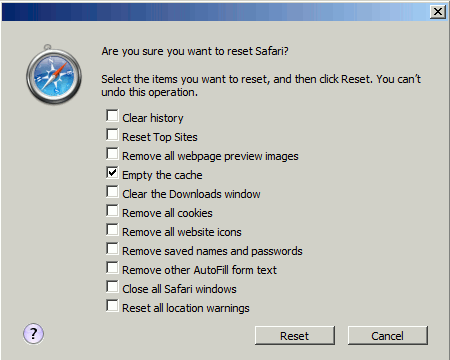
- Select Reset Safari in the drop-down menu.
- Choose the items you wish to clear. Note: It's advisable to keep (do not select) saved names and passwords.
- Click the "Reset" button.
- Exit and re-launch Safari.
 Safari (for Mac)
- Open Safari
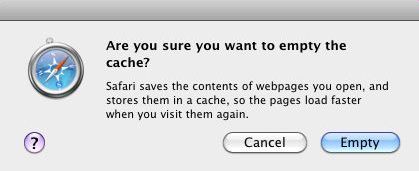
- Click on "Safari" in the Menu bar and select "Empty Cache" from the dropdown.
- Click the "Empty" button to confirm.
 Opera
Opera
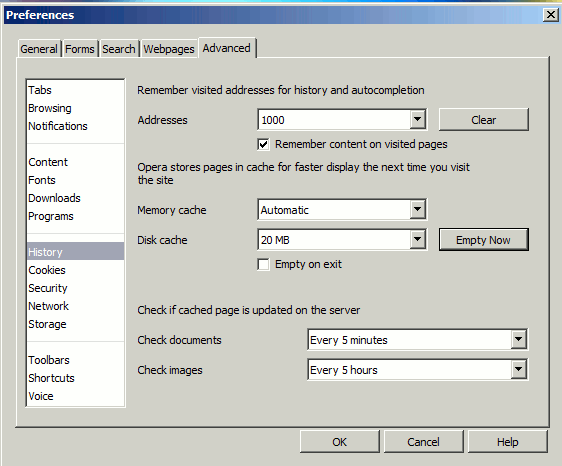
- Open Opera.
- Click Tools in the menu bar. If your menu bar is hidden, click the "Opera" button in the upper left of the browser and select "Show Menu Bar."
- Select "Preferences" from the Tools menu.
- Click the Advanced tab.
- On the left side of the Preferences window, click History.
- In the "Disk cache" area, click the "Empty Now" button.
- Click the "OK" button to close the Preferences window.
After clearing your browser cache, you should now be able to view any recent changes you've made to your site. If you have any questions, or need any additional assistance, please feel free to let us know by asking a question in our Community Support area.


We value your feedback!
There is a step or detail missing from the instructions.
The information is incorrect or out-of-date.
It does not resolve the question/problem I have.
new! - Enter your name and email address above and we will post your feedback in the comments on this page!