You can use Softaculous to quickly install PrestaShop into your Web Hosting Hub account. You can install both the latest PrestaShop version of 1.5 (version 1.5.4.1) and and an older version- version 1.4. We will walk you through the process of using Softaculous to install PrestaShop 1.5.4.1 on to your webserver.

Using Softaculous to Setup PrestaShop

  1. Log into the cPanel then go to the Software/Services section and click on the Softaculous icon.
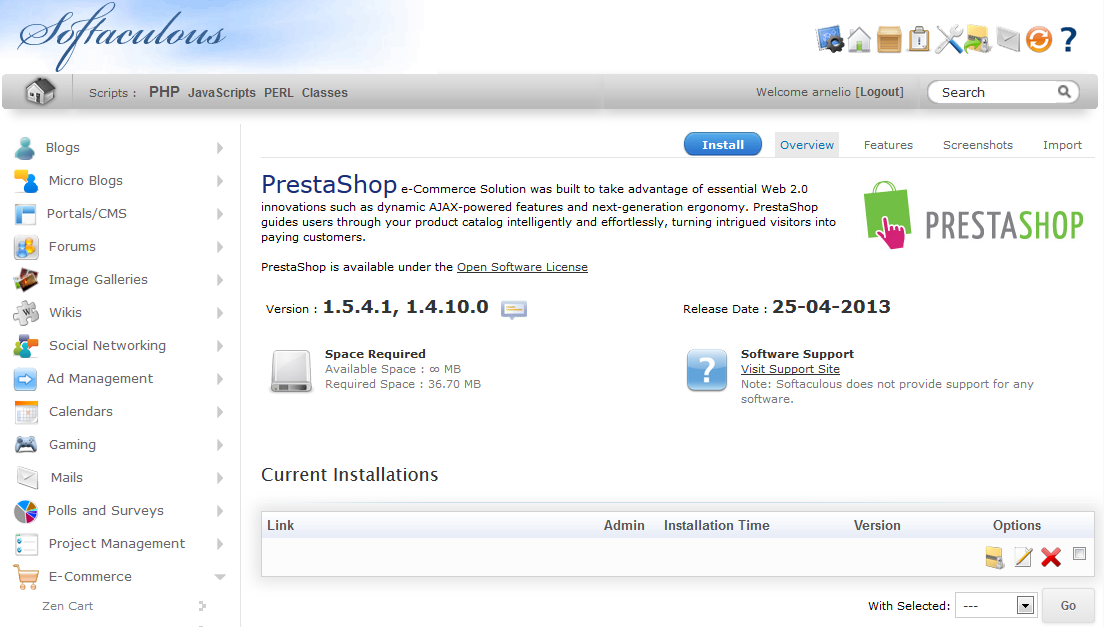
  2. PrestaShop Install screen in Softaculous When Softaculous opens you will see a menu on the left hand side of the screen. Look for "E-commerce" and click on PrestaShop when you see it. There are also icons on the right side of screen listed under "Top Applications". You may also see an icon for PrestaShop in this list. You can click on it to start the install there as well.
  3. The INSTALL screen contains several sections for the setup of PrestaShop. The table below identifies each section and provides a description. You can use Softaculous to quickly install PrestaShop into your Web Hosting Hub account. You can install both the latest PrestaShop version of 1.5 (version 1.5.4.1) and and an older version- version 1.4. We will walk you through the process of using Softaculous to install PrestaShop 1.5.4.1 on to your webserver.

    This will complete the installation process. You will see a Softaculous-generated screen similar to the following after the install has finished.

    Database Settings

    The links given in this final screen will go to the PrestaShop storefront and to the administrator dashboard as per the settings that you selected in the install process.

    Section name Description of section Screenshot of PrestaShop Install section
    SOFTWARE SETTINGS /
    Choose the version you want to install Select version 1.5.4.1 PrestaShop if necessary(it's set to this version by default). You can select the older version by clicking on the drop-menu next to the version number.
    Choose Protocol If you have purchased an SSL certificate, you can set the SSL link here.
    Choose Domain Select a domain by clicking on the drop-down menu. This will only list domains that have been added to your account
    In Directory This option lets you select the directory where PrestaShop will be installed. For example, if you enter "store" and the domain name that you selected earlier is "abcd.com", then the Path to get to the PrestaShop store front is "http://abcd.com/store".
    Databasename You can set the database name that will be used when the database is created
    SITE SETTINGSSite Settings
    Store name This is the name of the store for which you are using PrestaShop to create
    Admin FolderThe folder that stores the administrator dashboard files can be specified here. It cannot be set to "admin". By default, it is set to "admin123". Please change this to another name of your designation.
    DATABASE SETTINGS Admin Account
    Table Prefix This is the prefix used to label the tables in the database for PrestaShop. For example, "ps_users" would be created if the table prefixe were left to the default of "ps_".
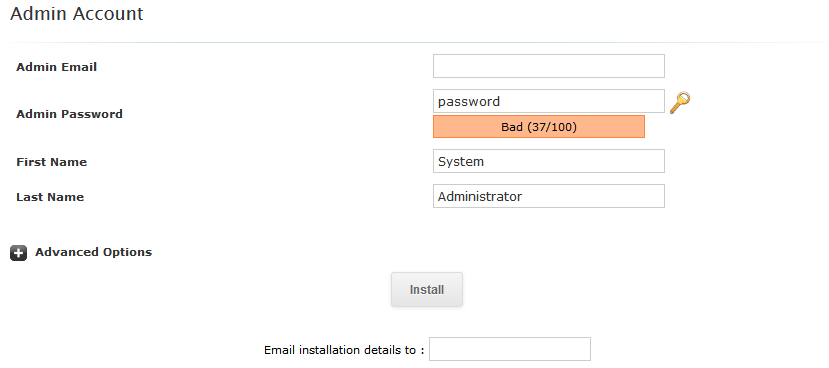
    ADMIN ACCOUNT settings Admin Account
    Admin EmailThis allows you to set the Admin email used to contact the Administrator of the Prestashop installation.
    Admin PasswordThis is where you set the password for the Admin login
    First NameFirst name used for the Adminstrator
    Last NameLast name of the Administrator
    Advanced Options Lets you set if you get notifications for the updates
    INSTALL buttonClick to begin the installation process
    Email installation details to:Lets you set an email address where the settings you used for the form above are emailed
  4. After you have finished filling all of the fields, click on the INSTALL button at the bottom of the screen.

When the installation process has concluded you will see a screen that gives you the link for the shop and also the administrator link for the dashboard.

Database Settings

The links given in this final screen will go to the PrestaShop storefront and to the administrator dashboard as per the settings that you selected in the install process.

Did you find this article helpful?

We value your feedback!

Why was this article not helpful? (Check all that apply)
The article is too difficult or too technical to follow.
There is a step or detail missing from the instructions.
The information is incorrect or out-of-date.
It does not resolve the question/problem I have.
How did you find this article?
Please tell us how we can improve this article:
Email Address
Name

new! - Enter your name and email address above and we will post your feedback in the comments on this page!

Did you find this article helpful?

Post a Comment

Name:
Email Address:
Phone Number:
Comment:
Submit

Please note: Your name and comment will be displayed, but we will not show your email address.

Related Questions

Here are a few questions related to this article that our customers have asked:
Ooops! It looks like there are no questions about this page.
Would you like to ask a question about this page? If so, click the button below!
Need More Help?

Help Center Search

Current Customers

Email: support@WebHostingHub.com Ticket: Submit a Support Ticket
Call: 757-416-6627 Chat: Click To Chat Now

Ask the Community

Get help with your questions from our community of like-minded hosting users and Web Hosting Hub Staff.

Not a Customer?

Get web hosting from a company that is here to help.
}