How to setup email on your iPhone 6
Setting up your email on an iPhone 6 may seem to be a challenging task. If you know your email settings, then setting it up is actually a fairly simple process. This tutorial will walk you through the process of configuring email on you iPhone 6.
-

Open your iPhone 6 so that you can see the application icons.
-

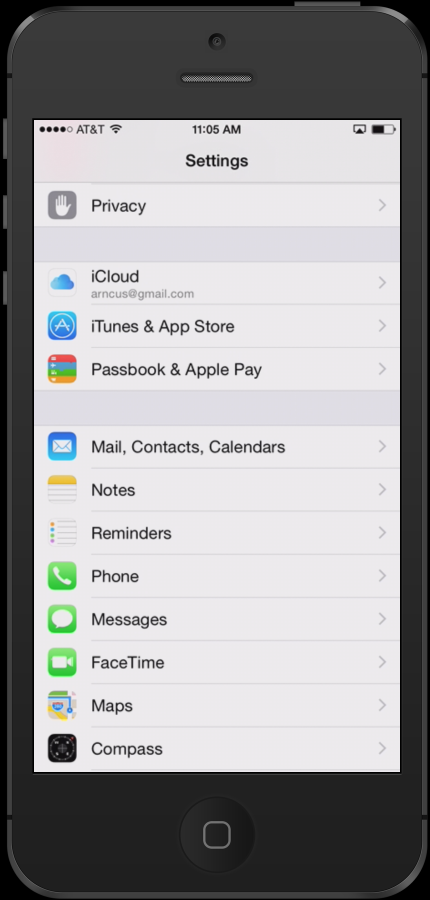
Find the Settings icon then click on it to open your iPhone 6 settings.
-

Search for the icon named Mail,Contacts, Calendars.
-

Click on Add Account. It will be in the section named "Accounts".
-

Click on Other. This will let you add a Web Hosting Hub email account.
-

You will then see an option that asks you to Add Mail Account. Click on this option to proceed.
-

You will then see a form that includes your name, your email address, password and a description of the mail account. Fill this information for your email account.
-

The next screen provides fields for both the incoming and outgoing mail server. If you require assistance, see our email settings article. The settings for IMAP and POP3 protocols can be found here. The settings provided in the tutorial are the settings you would fill in for the incoming and outgoing mail servers.
-

When you proceed to the next screen after filling your incoming and outgoing mail server settings, your iPhone 6 will try to verify the server settings that you have added. If the certificate has not been trusted then you will see an error message stating that your server can not be verified. Click on Details. You should be able to see that the self-signed certificate is identified with your server name. You can then select to trust the certificate. Once it is trusted, the server will be able to be verified.
-

Once everything has been verified, a screen checking off all of the email account settings will briefly appear. This will be followed by a screen which has sliders for enabling Mail and Notes. By default, both of these options are enabled. At the top of the screen will be options to Cancel or Save. Click on Save to add your email account.
Congratulations, this completes the configuration your Web Hosting Hub email account on your iPhone 6! When you have completed the email setup, return to the main screen of your iPhone and click on the Mail icon. You will see the account in the Mail-boxes section listed by your email description. Here's how it looks on my iPhone 6:


We value your feedback!
There is a step or detail missing from the instructions.
The information is incorrect or out-of-date.
It does not resolve the question/problem I have.
new! - Enter your name and email address above and we will post your feedback in the comments on this page!