How to Add New Payment Processors in OpenCart 1.5
Payment processors, also called payment gateways, are important to your store, because they allow your customers to pay for products using a variety of methods, though primarily with a credit card. You may also see methods that include bank wire transfer or phone payment. Adding new payment gateways in OpenCart is a matter of adding a new extension. The following OpenCart 1.5 tutorial will show you how to load and edit a new payment processor.
How to Install a new Payment Processor in OpenCart 1.5
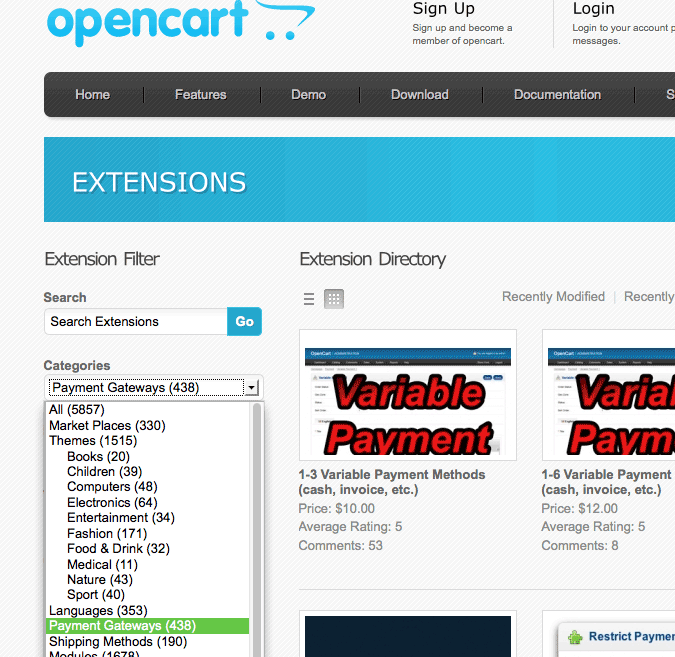
- Go to the OpenCart Home page and select EXTENSIONS from their menu. Go to the drop-down menu on the left that says CATEGORIES and select PAYMENT in the list:
- Select the payment gateway that you wish to load into your OpenCart installation. Remember that not all of the extensions are free. Make sure to verify that you match the version number of the extension with the version of OpenCart that you have loaded. They should be the same
- Once you have downloaded the payment gateway extension you want to use, follow its directions on installation. These directions may vary, so make sure to read the documentation that they provide
- Login to the Administration Dashboard as an Administrator
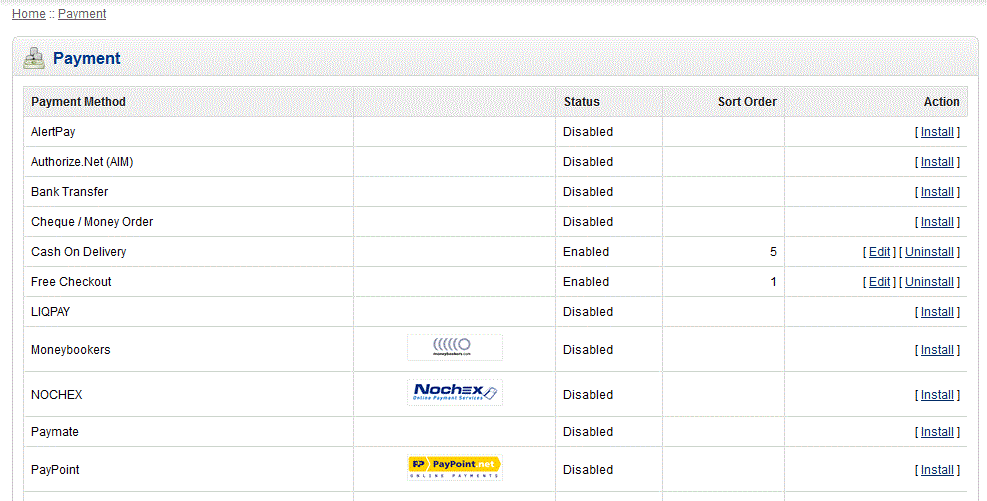
- Hover over the menu bar where it says EXTENSIONS. When the drop-down appears, click on PAYMENTS and you will see a list of the default payment gateways that come loaded with Opencart:

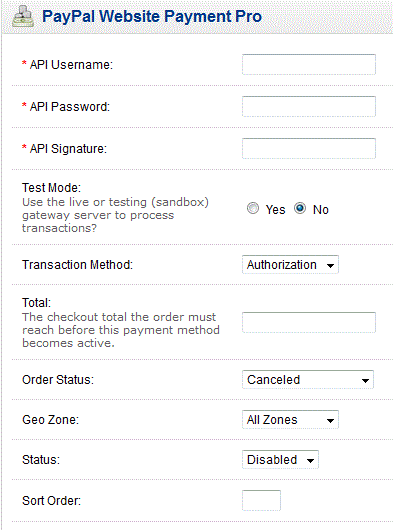
If you have followed the installation instructions properly, you will see your new payment gateway added to the list. To complete the installation, select INSTALL at the far right. - The completion of the installation doesn't mean you're quite finished yet. You will need to select EDIT in order to configure the newly added payment gateway. The screens for a payment gateway may often differ from other payment methods or payment gateways. Carefully review the instructions for configuring each payment gateway and consult with the vendor support if required. Here's an example of an edited payment gateway:

Note that some of the items that you will see in every payment gateway include:
Order Status - default order status when payment extension used. This value may vary based on the payment gateway. Please see invididual gateway instructions for further information
Geo Zone - determines where the geo zone that this payment gateway will be active
Status - allows the administrator to quickly disable the option if necessary. Setting option to DISABLED will simply remove the payment option from the customer's screen
Sort Order - allows you to set the order in which the payment extensions are displayed - Once you have modified or configured the gateway as required, click on SAVE in order to save the options you have entered
Payment gateways can widely vary, and depending on your business requirements you may need to load them. Carefully select what is appropriate to your business and to your customers. When you customers login, payment options will only appear in the checkout stage. Here's an example of what they may see:
Note: The selection of preferred payments above will expand as you add more payment options and make them available to your customers.


We value your feedback!
There is a step or detail missing from the instructions.
The information is incorrect or out-of-date.
It does not resolve the question/problem I have.
new! - Enter your name and email address above and we will post your feedback in the comments on this page!