Installing PrestaShop
In this tutorial we walk you through the steps of a manual install of PrestaShop. While a manual software installation may seem a bit intimidating at first, we will guide you through the steps of the process and you will have your PrestaShop store up and running very quickly.
Since PrestaShop is PHP based software that uses a database, we will first want to create a database and user and assign that user to the database with all privileges. For step-by-step instructions, please see our article How to create a MySQL Database. Make sure you take note of the database name, database user, and password you create. We will need those later in this process when we begin installing PrestaShop.
Downloading and Uploading PrestaShop Installation Files
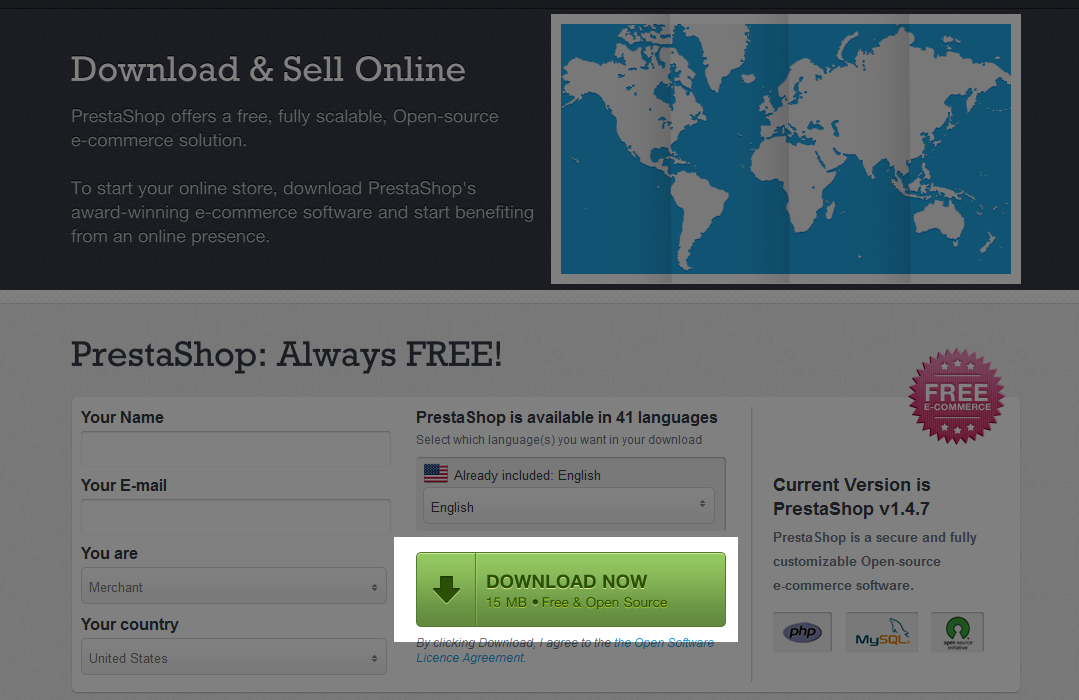
- Begin by downloading the latest version from the PrestaShop website:
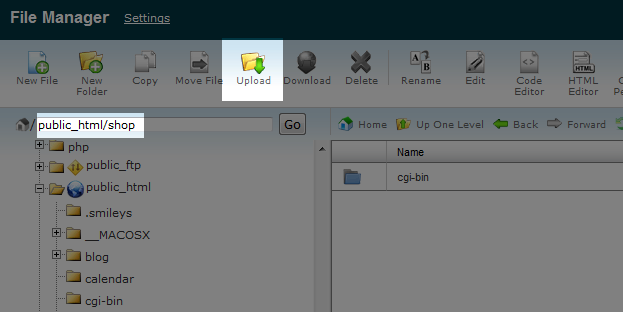
- Once the download completes, using an FTP program (e.g. FileZilla or Cyberduck) or the cPanel File Manager, upload this zip file to the correct directory in your account. The correct directory will depend on where you want to use PrestaShop:
- Will you be using PrestaShop for your entire site? If yes, then upload the files to the site's document root. If the site is your main domain, then upload the files to public_html. If you are installing PrestaShop for an addon domain, then upload the files to the document root of that addon domain (e.g. public_html/addondomain.com).
- If you want to install PrestaShop into a subdirectory (e.g. yourdomain.com/store) then create that directory and upload the files to that directory.
- If you want to install PrestaShop on a subdomain of your site (e.g. shop.yourdomain.com) then first create the subdomain, take note of it's document root, and then upload the files to that subdomain's document root.
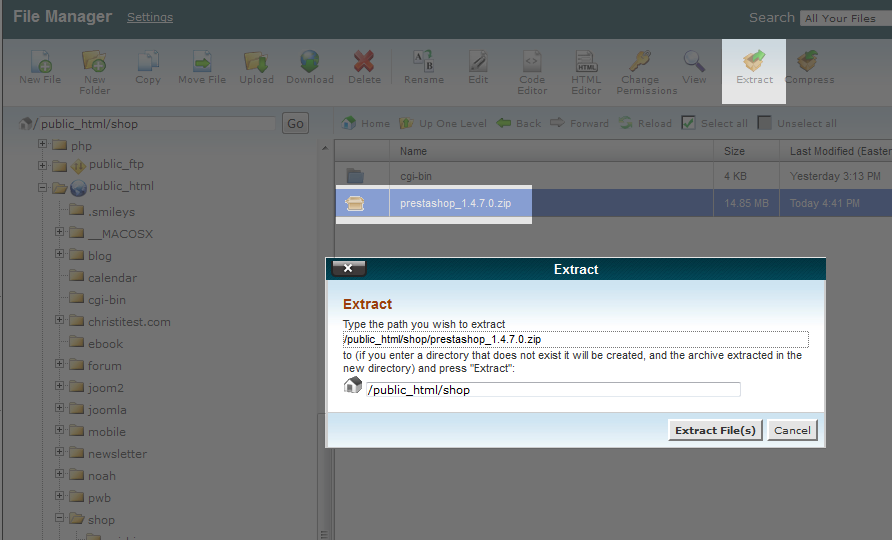
- Next, extract the zip file by clicking on the file and then selecting Extract from the File Manager menu or right click the file and choose Extract in the menu that appears.
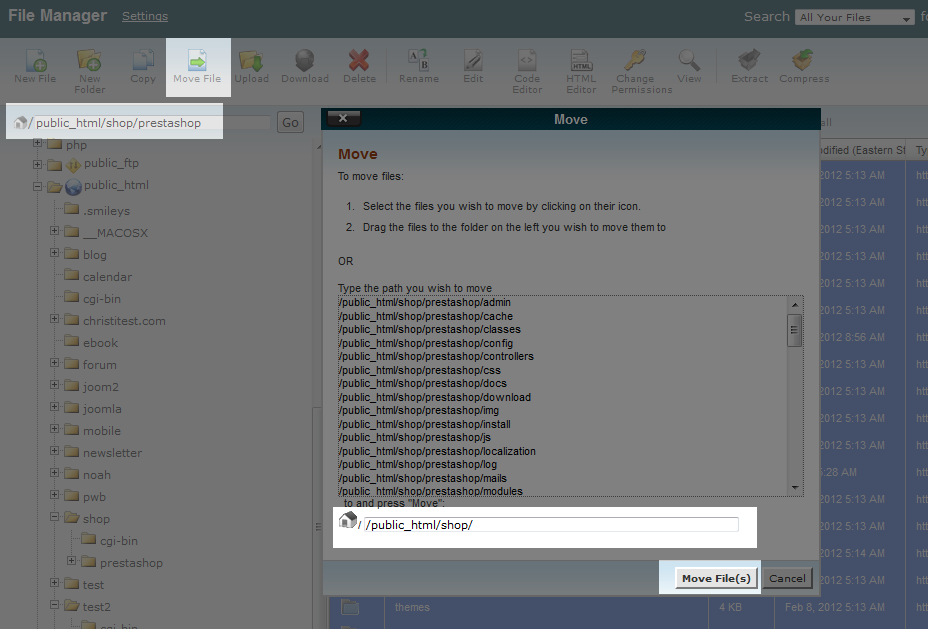
- Because this creates an extra subdirectory named prestashop, we will want to move all of the files and folders inside of that folder up one level to the correct directory. Navigate into the prestashop folder, select all of the files, then click Move File from the File Manger menu (you can also right click over any of the highlighted files and select Move). When the move dialog appears, delete "prestashop" so that your files will be moved up one level into the correct directory.
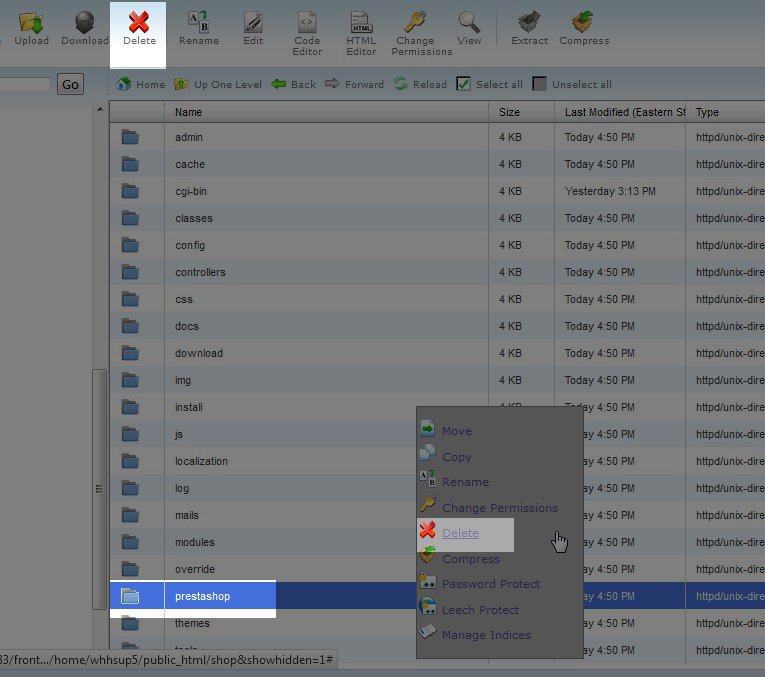
- Once all the files are moved, you can delete the prestashop directory. Either select the directory and then click Delete in the File Manager menu or right click the file and select Delete.
http://www.prestashop.com/en/download
In this example, I will be installing PrestaShop into the shop subdomain of my main domain (shop.example.com). I will upload the PrestaShop zip file to the shop directory (document root for that subdomain).
Installing PrestaShop
- To run the PrestaShop installer, simply navigate to your site where you just moved the PrestaShop files to. In this example I'm installing PrestaShop to shop.example.com so I will go to that subdomain in my browser to automatically run the PrestaShop installer.
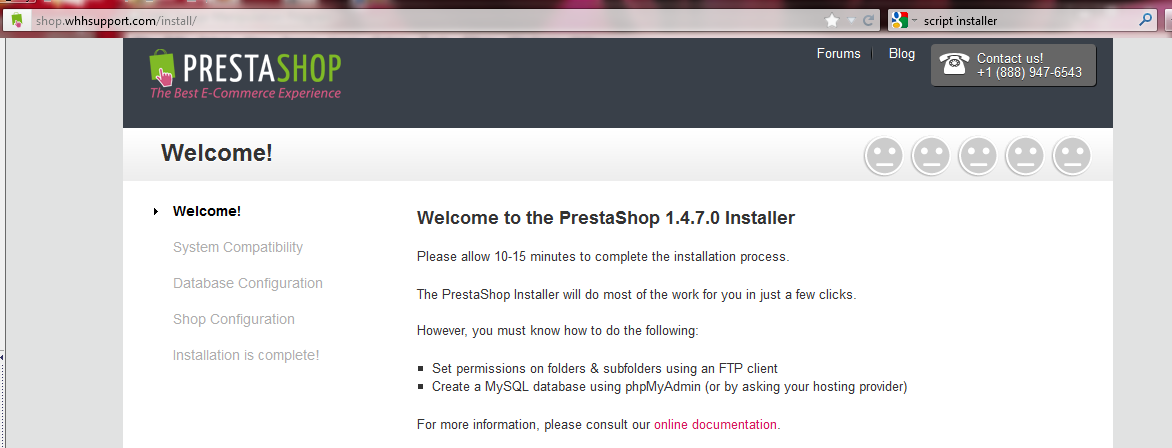
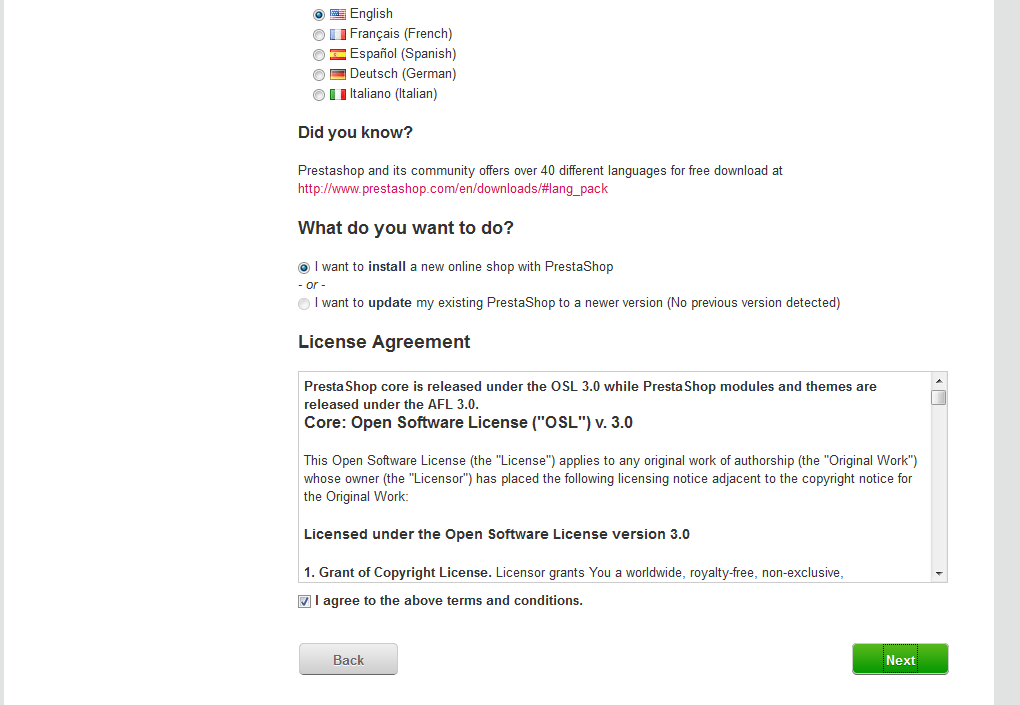
- Choose your preferred language, select I want to install a new online shop with PrestaShop, review the License Agreement and select that you agree with the terms and conditions of the License Agreement. Click on the Next button to continue the installation process.
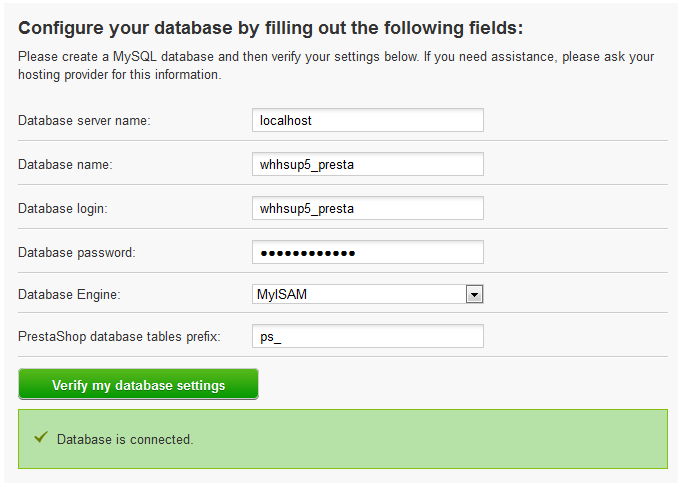
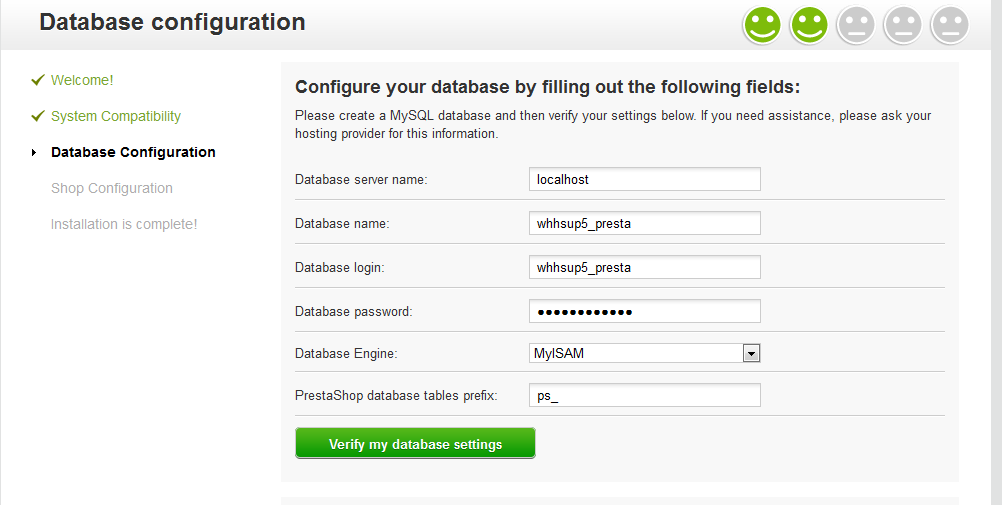
- PrestaShop will run a System Compatibility scan and quickly move on to the Database Configuration page. On this page we will want to fill in the details for the database we created at the beginning of this tutorial. If you've ever manually installed PHP software, this step will be familiar.
- Click the Verify my database settings button to confirm PrestaShop can connect to your database.
- Installation type
You can choose between a basic installation or full installation. The basic installation will not include any modules, theme, or demo products and categories. The full installation installs core modules, additional modules, demo products, and will include a theme. For this example I will choose the full installation. This will give us a good starting point to really see what PrestaShop will look like to our visitors. We can always disable modules we don't need and remove the test products and categories as well. - Email configuration
To verify email notifications are working correctly, enter your email address and click the Send me a test e-mail button. You should see a notification that a test email has been sent.
- Click the Next button at the bottom of the page to continue.
- The next page in the installation is Shop configuration
- Shop settings and merchant account information
Most of this is self-explanatory, but some options/fields may need a little more explanation:
Shop logo Upload your store's logo. Recommended dimensions for the logo are 230px wide X 75px high. You will want to replace the default PrestaShop logo since this logo will be used: - On all pages of your store
- In e-mails sent to customers
- In documents such as invoices, return authorizations, etc.
Catalog mode only This disables purchases in your store. This can be useful to enable while you are still setting up your site. It's also helpful if you wish to just show a catalog of services or products without offering online purchasing. This can be changed any time you like through the Back Office (where you manage your store) after installation is complete (Preferences tab). 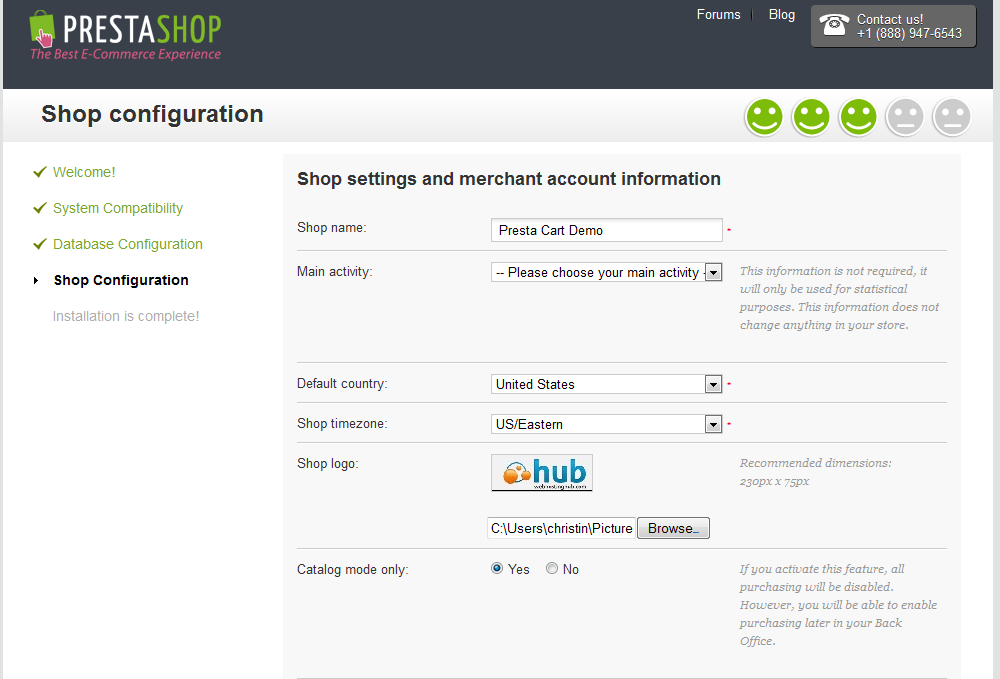
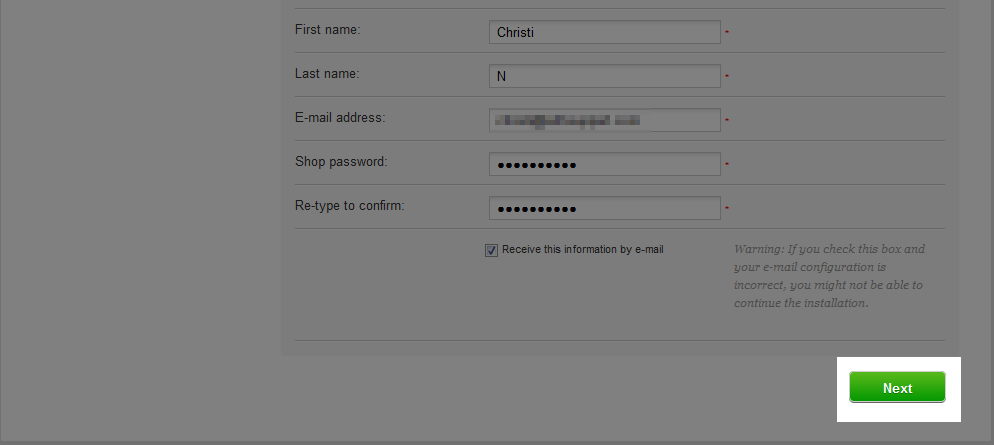
- Once you've filled in your information and uploaded your shop's logo, check the box to receive the information via email, and click the Next button to continue.
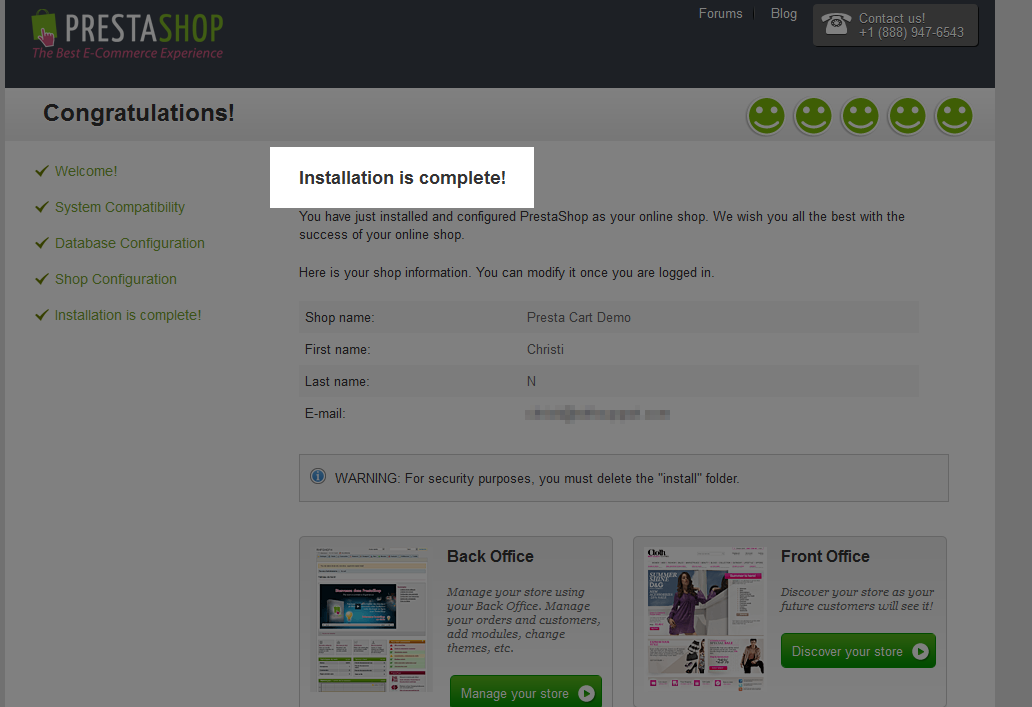
- On the next page, you'll see the good news that your installation is complete!
| Database configuration | |
|---|---|
| Database server name | localhost |
| Database name | The database name you created earlier |
| Database login | The database user you created earlier |
| Database password | The password for the user you created |
| Database Engine | MyISAM |
| PrestaShop database tables prefix | You can leave the default ps_ prefix |
Now that we've manually installed PrestaShop, there are a few suggestions we should follow to secure our PrestaShop installation. In our next article in this series, we will learn a few easy steps to take to do this.

We value your feedback!
There is a step or detail missing from the instructions.
The information is incorrect or out-of-date.
It does not resolve the question/problem I have.
new! - Enter your name and email address above and we will post your feedback in the comments on this page!