Upgrading PrestaShop With the Autoupgrade Module
In this tutorial, we walk through the steps of using the Autoupgrade module to upgrade our PrestaShop installation. If you haven't already, make sure you are using the latest version of the module by following the instructions provided in our previous article on installing the Autoupgrade module in PrestaShop. The Autoupgrade module provides you with a much easier upgrade process than a manual upgrade of PrestaShop.
- Create a backup of your site before updating your PrestaShop version. You can choose to make separate backups of your database and files, or simply create a single full cPanel backup of your entire account.
- Once you have created a backup of your PrestaShop site and downloaded the backup to your loacl computer, log into your PrestaShop back office.
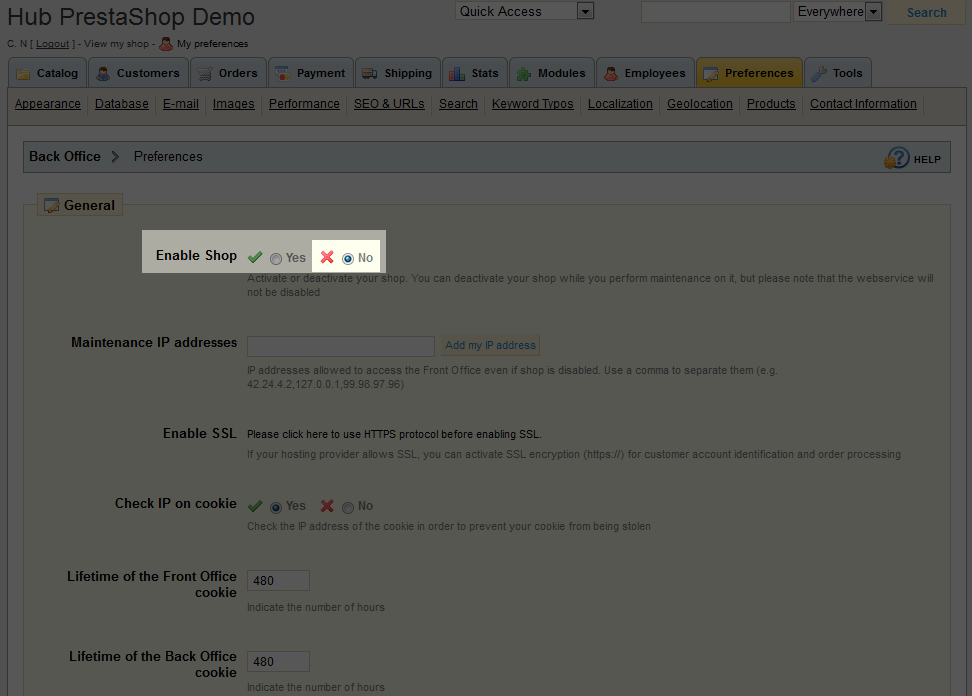
- Before we can begin the upgrade process, we first need to disable our PrestaShop store so that we can use the Autoupgrade tool. Select the Preferences tab and then select No next to Enable Shop at the top of the Preferences page.
- Scroll down to the bottom of the page and click Save.
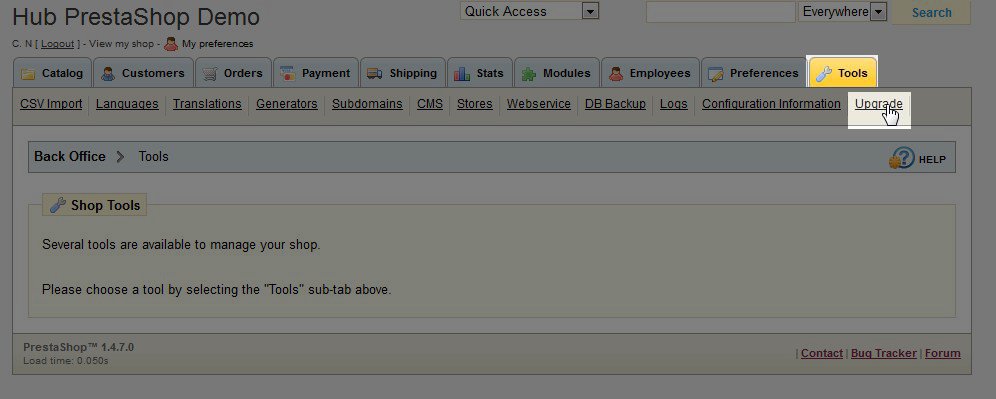
- The Autoupgrade module creates a new link under the Tools Tab. Select the Tools tab and then click on the new Upgrade link under Tools.
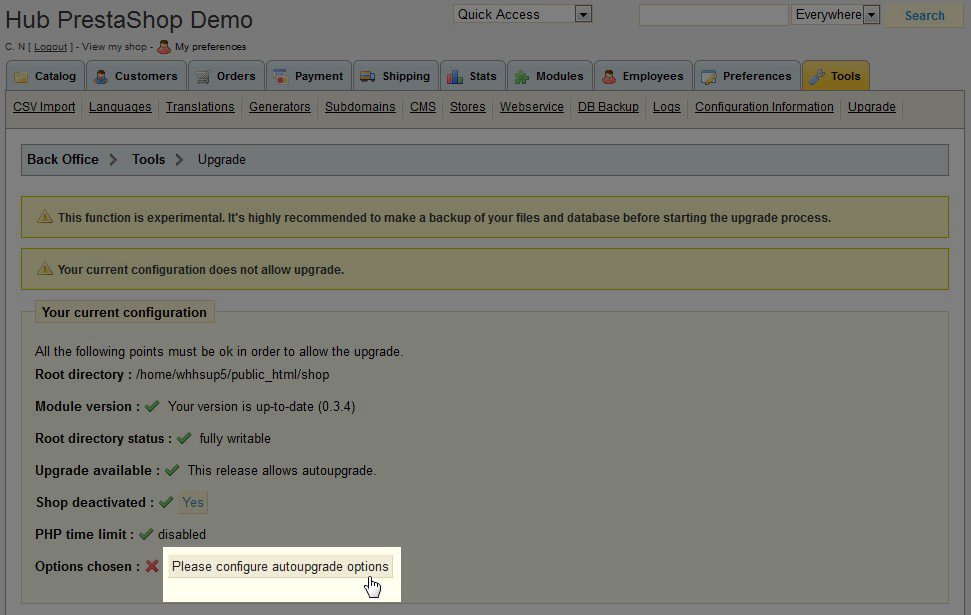
- Under Your current configuration click on the button to configure autoupgrade options.
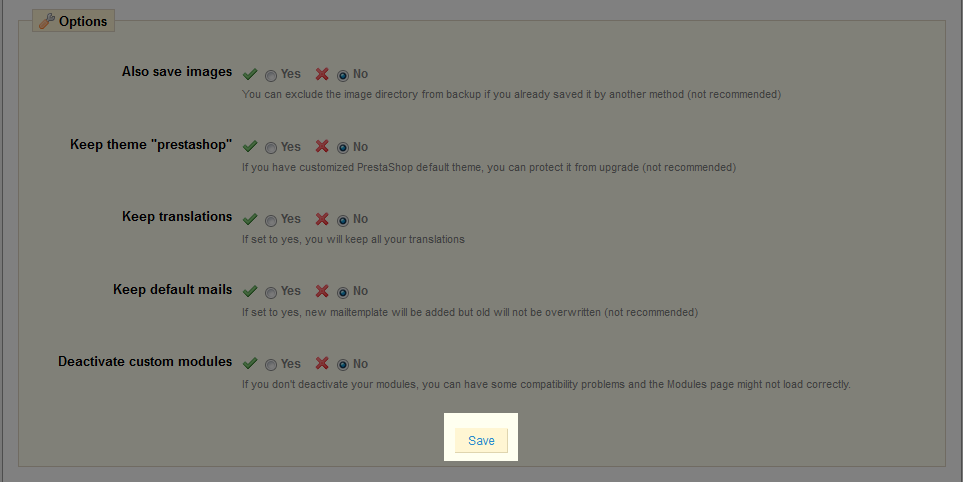
- Review the settings and make any necessary changes. Click the Save button when you are done.
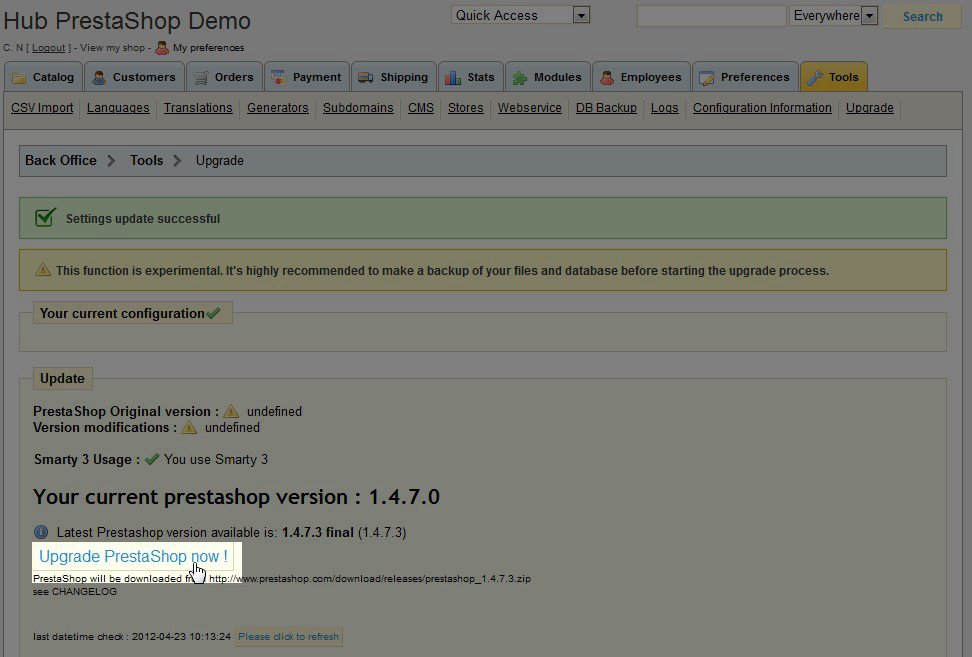
- Once your options are saved, click on the Upgrade PrestaShop now button.
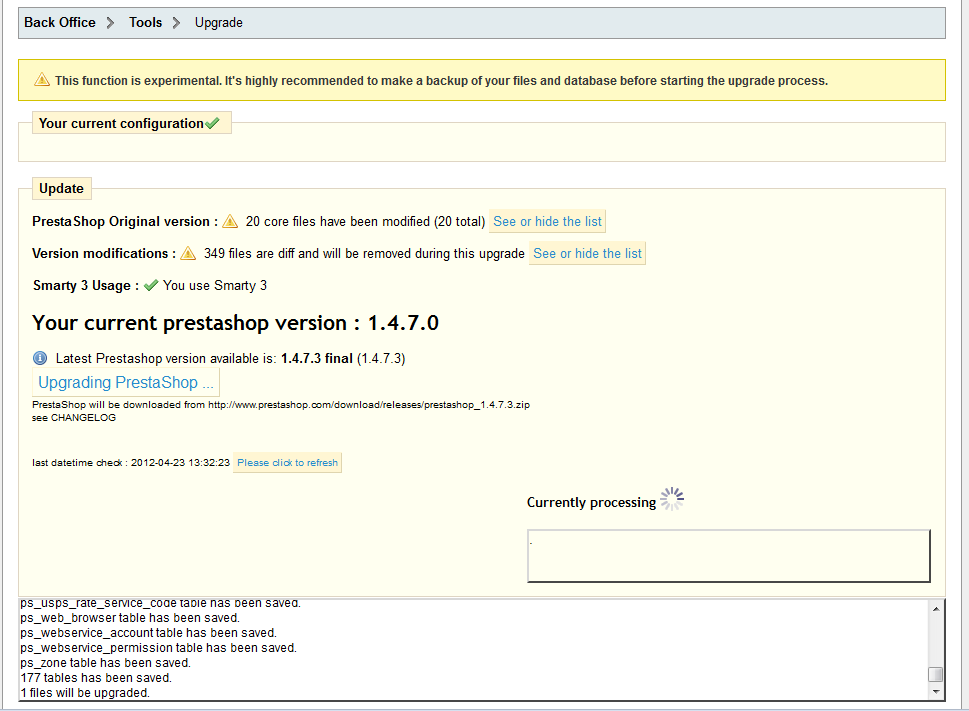
- The upgrade process may take several minutes, while the upgrade is taking place, you will see updates to files listed in the box below the Update heading.
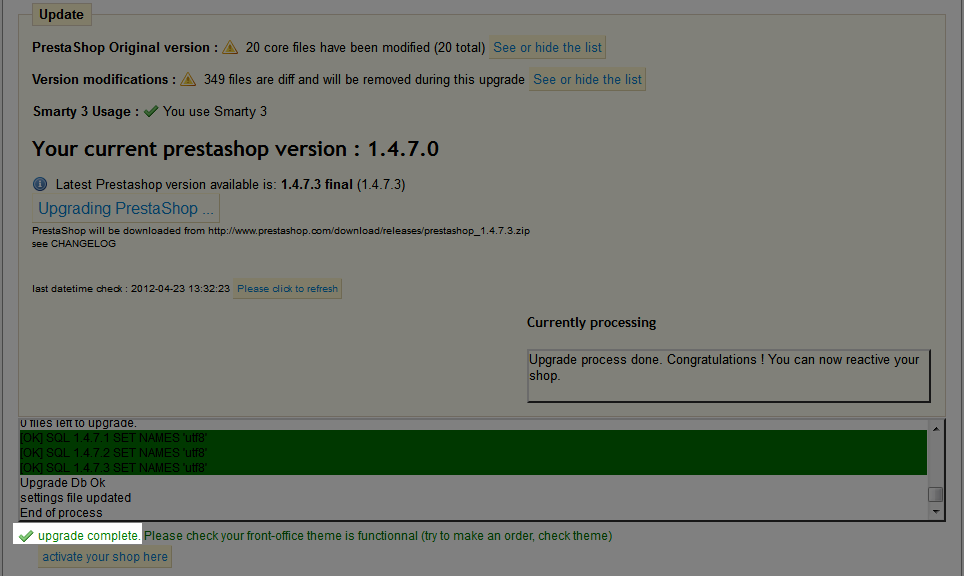
- Once the upgrade has finished, you will see a notification that the upgrade is complete.
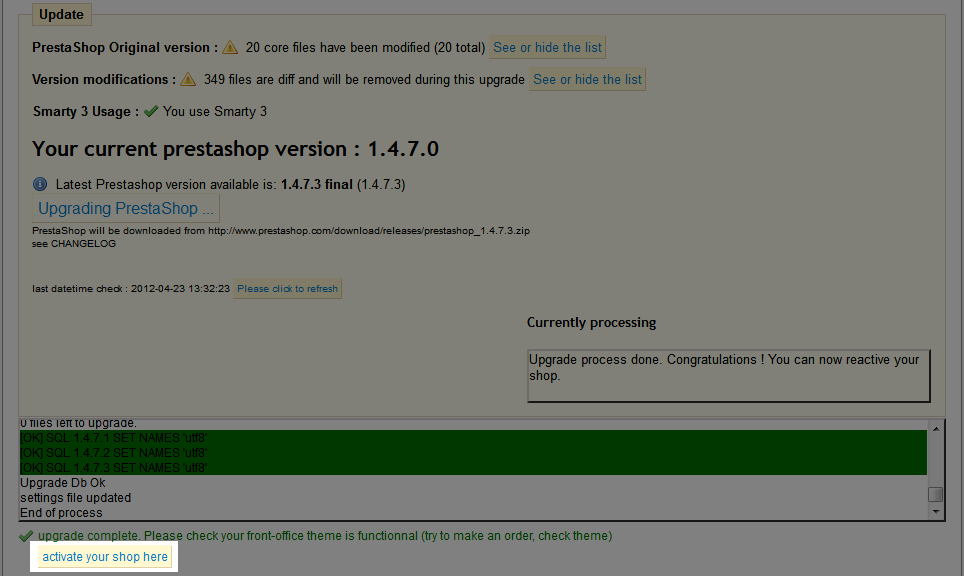
- Click on the activate your shop here button to be taken to the Preferences tab where you can re-enable your PrestaShop store.
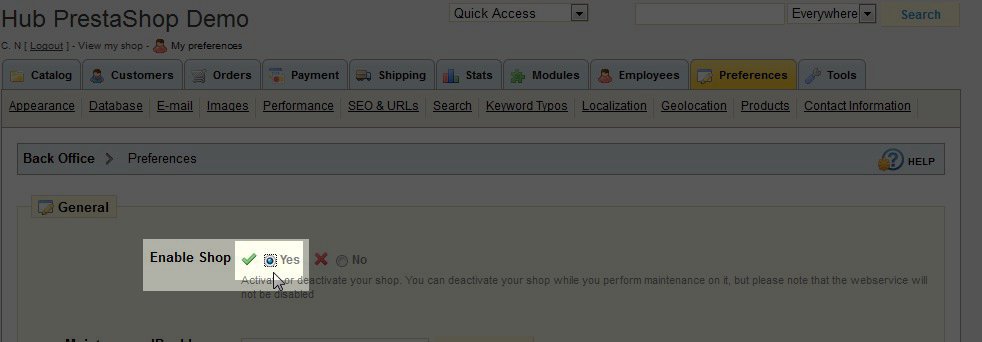
- In the PrestaShop Preferences, select Yes beside Enable Shop to re-enable your PrestaShop store.
- Scroll down to the bottom of the page and click Save.
Your PrestaShop store is now updated and you can verify everything has updated correctly by visiting your site. If you have any trouble with your upgrade, you can perform a Rollback through the Autoupgrade module (Tools > Upgrade > Rollback). This Rollback feature is another advantage of the Autoupgrade moduel over a manual upgrade of PrestaShop.
Help Center Login
Upgrading PrestaShop
| 1. | Installing the Autoupgrade module in PrestaShop |
| 2. | Upgrading PrestaShop With the Autoupgrade Module |

We value your feedback!
There is a step or detail missing from the instructions.
The information is incorrect or out-of-date.
It does not resolve the question/problem I have.
new! - Enter your name and email address above and we will post your feedback in the comments on this page!