How to fix the PHP strict standards error
When working with PHP you may occasionally see messages and errors on the screen. You have the ability to determine which types of these messages you want the PHP to print onto the screen. One of these types of messages is the E_STRICT, or 'strict standards' message. Until recently, this type of message had to be specifically selected to display. This article will guide you on how to prevent the message from displaying on your website.
What is this error?
The 'strict standards' message is not actually an error that requires attention to the code. It is a message meant more for developers who may or may not be coding to specific standards.
Why am I getting this message?
This message is displayed via the E_STRICT setting in PHP. This is set in the php.ini file. Prior to version 5.4, this had to be explicitly called in order to show up. After the release of version 5.4, however, this message was included in the E_ALL group. If you have recently upgraded your PHP version from something less than 5.4 to 5.4 or above, this message may display. It may also display if you have transferred from another server that had a PHP version earlier than 5.4 to a server running 5.4 or later.
How do I remove the strict standards error message?
- First, log into cPanel.
 Next, click on the File Manager icon found in the Files category.
 Locate the php.ini file and open it for editing. Please contact our Live Support team for a php.ini file if you do not have one in your account.
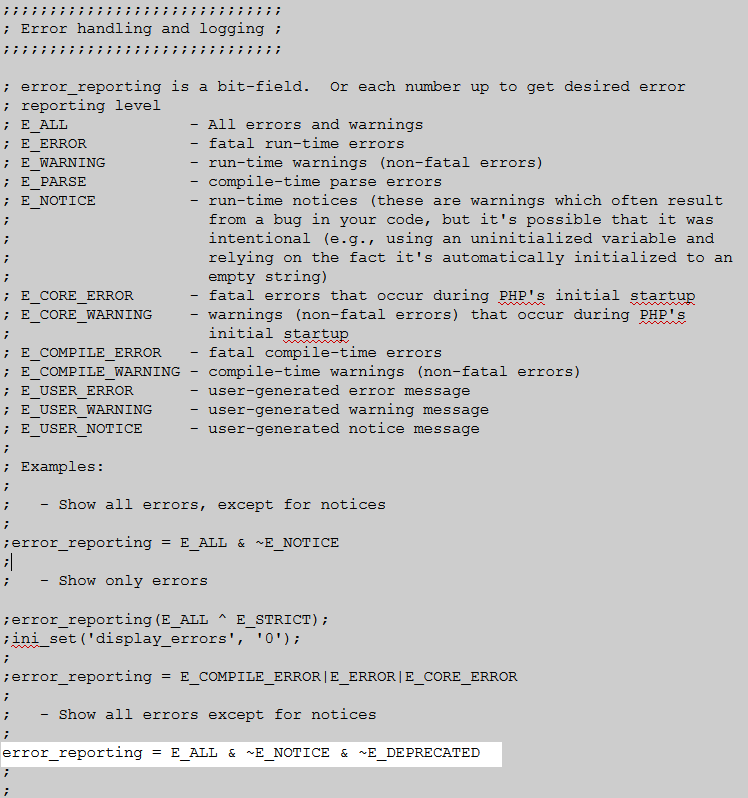
 When editing the php.ini file, find the settings for error reporting and locate the particular setting that is active. This is the one that does not have a semicolon in front of it. Those with the semicolon are commented out and not active.
 Once you have found the active setting, add & ~E_STRICT to the very end of it. This tells php.ini to ignoce the 'Strict Standards' messages.
- Once completed, click on the Save Changes button, located in the upper right corner of the screen, to activate the modified settings.

We value your feedback!
There is a step or detail missing from the instructions.
The information is incorrect or out-of-date.
It does not resolve the question/problem I have.
new! - Enter your name and email address above and we will post your feedback in the comments on this page!