Installing TYPO3 Manually
Web Hosting Hub customers have the option of easily installing TYPO3 through Fantastico De Luxe. If you are not a current Web Hosting Hub customer, this tutorial provides instructions for installing TYPO3 manually.
TYPO3 needs a MySQL database to connect to. Before beginning the TYPO3 manual installation process, create a MySQL database and user through cPanel. If your host doesn't use cPanel, they will be able to assist you with the steps for creating a MySQL database and user in your account. Be sure to make a note of your database name, database user name, and user password.
Downloading TYPO3 install package and uploading TYPO3 to your Server
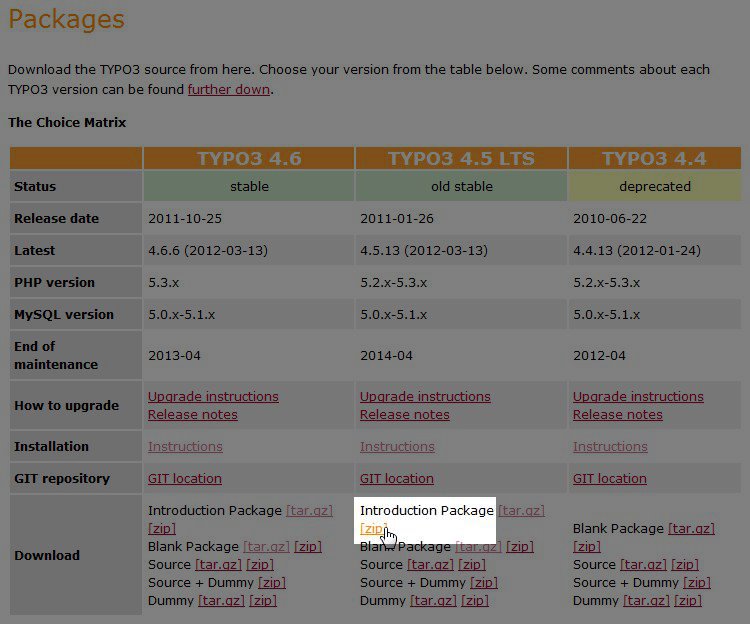
- Begin by downloading your preferred TYPO3 package from the TYPO3 website:
In this example, we will be installing the Introduction Package since it includes a template and some common extensions. While working through this installation tutorial, I found that the .zip package was easier to work with than the due to some issues with file permissions in the tar.gz package.
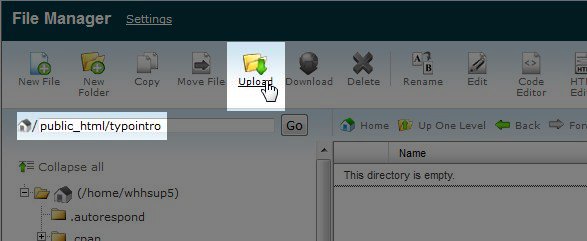
- Once your download has completed, using either FTP or the cPanel File Manager (or your host's equivalent file management tool), upload the .zip file to the directory where you wish to install TYPO 3. In this example, I am installing TYPO3 to a subdirectory named typointro.
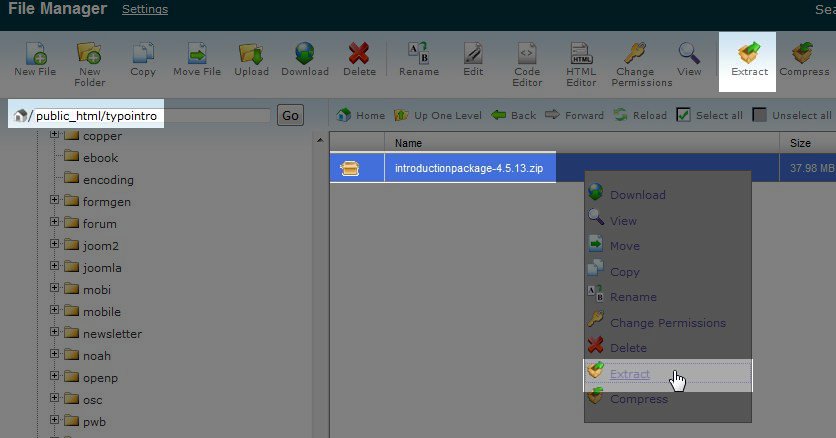
- Once the TYPO3 .zip file is uploaded, using the cPanel File Manager, select the file and choose Extract from the File Manager menu or right click the file and choose Extract from the right click menu.
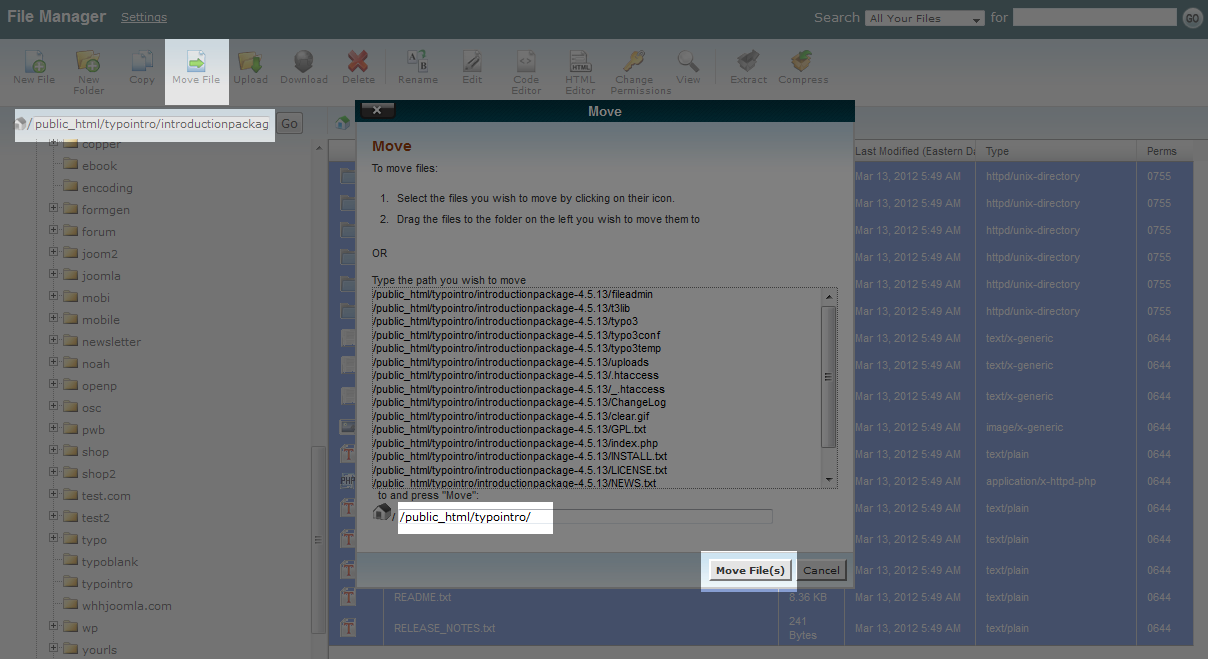
- Next, we will want to move the files up one level since the extraction creates an extra subdirectory named introductionpackage-4.5.13. In the introductionpackage-4.5.13 folder, select all of the files, then click Move File from the File Manger menu (you can also right click over any of the highlighted files and select Move). When the move dialog appears, delete "introductionpackage-4.5.13" so that your files will be moved up one level into the correct directory.
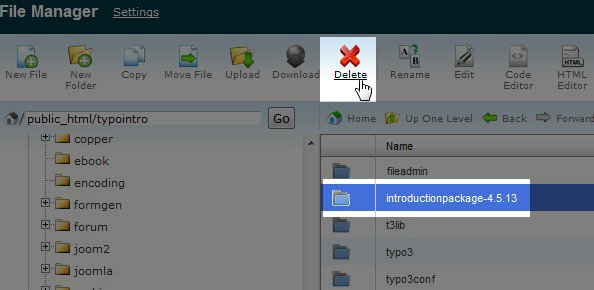
- Once all of your files are moved, delete the empty introductionpackage-4.5.13 directory.
Now that the TYPO3 install package is uploaded and extracted on the server, we're ready to move onto the next part of the manual TYPO3 installation.
Running the TYPO3 Installer
- In your browser, navigate to your website. If you installed TYPO3 to a subdirectory, be sure to add that subdirectory onto the URL in the browser address bar. For example, I'm installing TYPO3 into the typointro subdirectory for my domain, so I will put example.com/typointro into my browser's address bar. This will automatically redirect you to the TYPO3 installer in your browser.
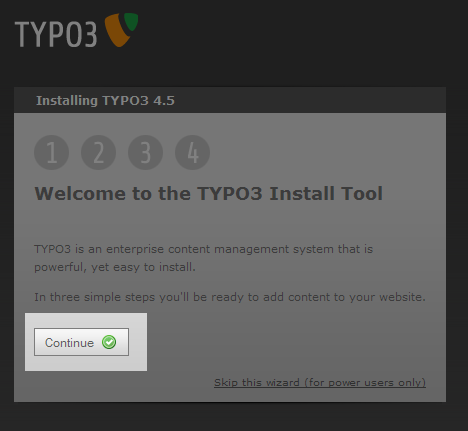
- Click the Continue button to start the TYPO3 manual install tool.
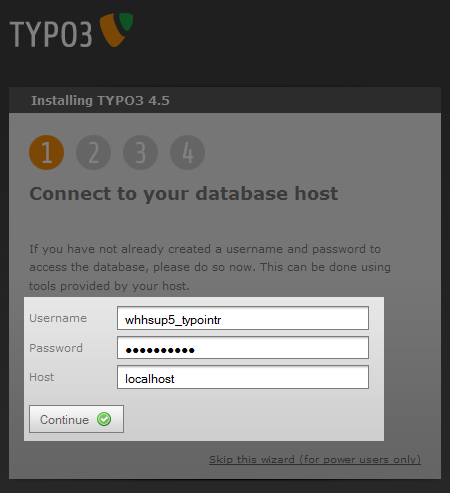
- On the next page, under Connect to your database host, input your database user name and password that you created at the beginning of this tutorial. You should be able to leave Host as the default loclahost (unless your web host uses a separate server for MySQL databases) and click the Continue button.
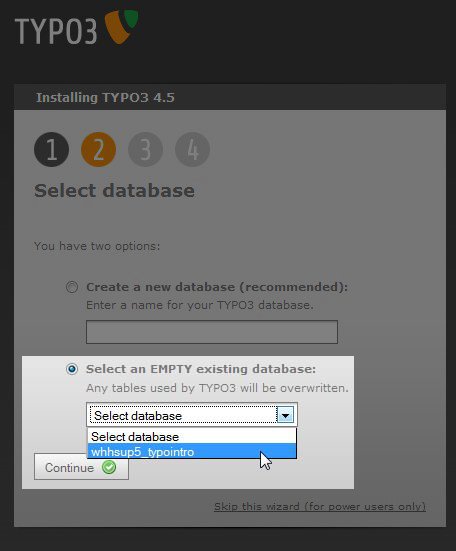
- On the Select database page, choose the radio button beside Select an EMPTY existing database: and choose your database from the drop down menu and click the Continue button.
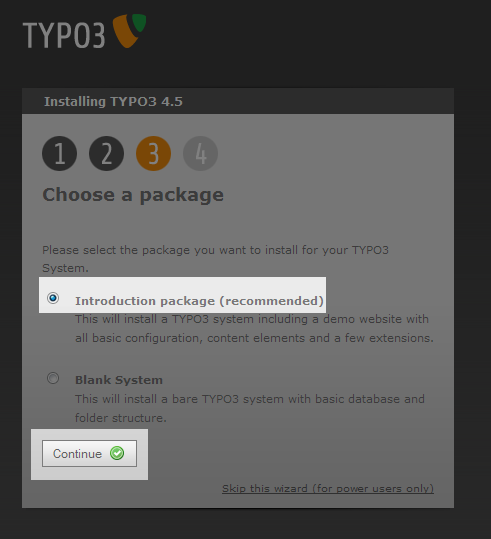
- On the Choose a package page, choose either Introduction package or Blank System. The introduction package is recommended since it will install a demo website with some basic settings already configured for you.
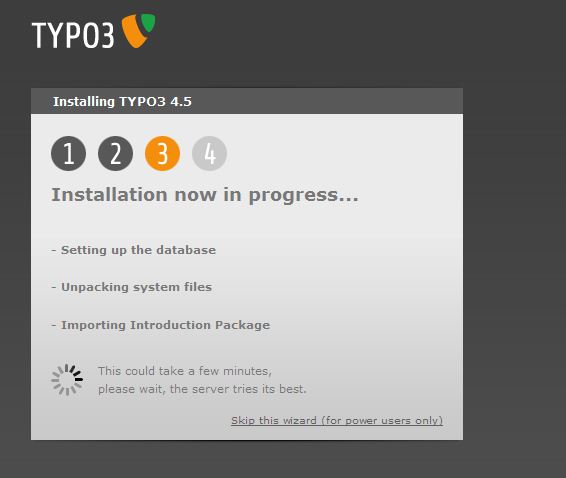
- Click the Continue button to connect to the database and move on to the next part of the TYPO3 manual installation process. You will see a notification that the installation is in progress and that installation may take a few minutes
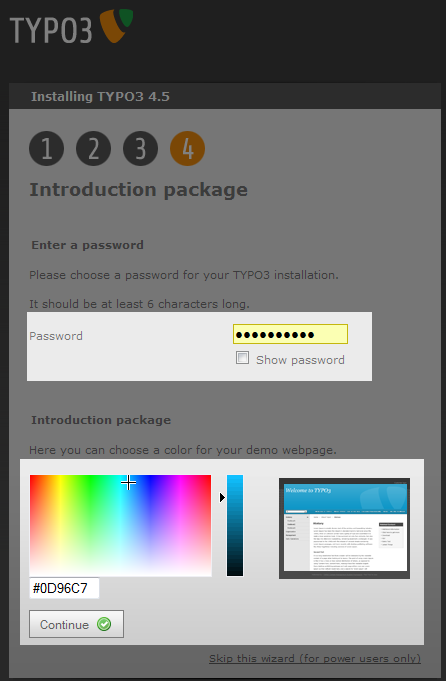
- On the final page of the installation tool, input a password for your TYPO3 installation. This will be the password you use when you log into the TYPO3 administration area (covered in a later article).
- Choose a color for your TYPO3 template if you would like to change the default color.
- Click the Continue button to finish your installation
Congratulations, you've completed your TYPO3 manual installation. You can click the Go to your Website button to view your new site. In our next article, we'll cover logging in to your Typo3 administration area.
If you run into any issues with your site either showing 500 errors or the style sheets not loading (site may have little to no formatting with a blank white background) check your TYPO3 file permissions. Because correct file permissions can vary between server configurations, it's best to contact your we host and ask what permissions your files and folders should be set to. They may also be able to assist you in changing permissions on multiple files (if needed) so that you do not have to change permissions one by one.

We value your feedback!
There is a step or detail missing from the instructions.
The information is incorrect or out-of-date.
It does not resolve the question/problem I have.
new! - Enter your name and email address above and we will post your feedback in the comments on this page!