How to Import HTML files into Modx
One of the strengths of Modx is its ability to take an existing webpage and integrate its content. A key to being able to accomplish this goal is the ability to import HTML files. Modx has an integrated interface for this purpose. The following tutorial will walk you through the steps to using the Import HTML option within the Modx Administrator dashboard.
Using the Import HTML tool within Modx
- Login to the Modx Administrator Dashboard.
- In order to perform the import you will first need to copy the HTML file(s) into your Modx installation. This can be done using the Resource Tree. Click on the FILES tab.
- Click on the arrow to the left of the MEDIA folder in the resource tree in order to expand files. You will see something similar to the following:
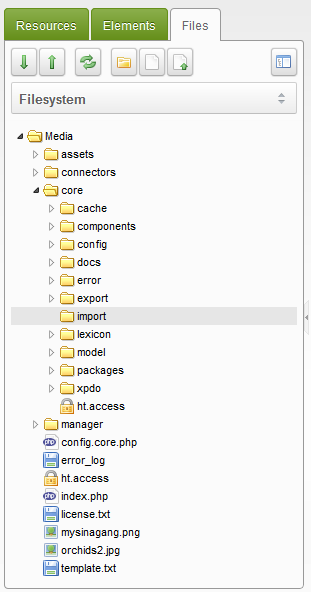
- Next, click on the CORE folder and then click on the IMPORT folder that appears to select it.
- Use your mouse and right-click on the folder. This step requires that you have access to your website HTML files. You will see the following:
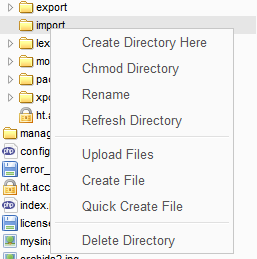
Select UPLOAD FILES from the menu. - The next window that opens allows you to select the files that you will be uploading to Modx. Here's a screenshot of that dialog window:
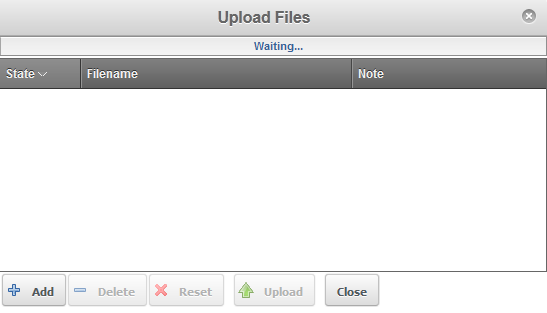
Click on ADD in order to select your files. You will need to click on ADD for every file you intend to import. - Once you have finished selecting the files, click on UPLOAD at the bottom of the UPLOAD FILES dialog window as per above.
- Once you have completed uploading the files, click on the CLOSE button at the bottom of dialog window to close the window. You will then see that the files you uploaded are in the UPLOAD folder in the resource tree.
- Next you will need to fill in the IMPORT information in the form that is labeled "Import site from HTML".
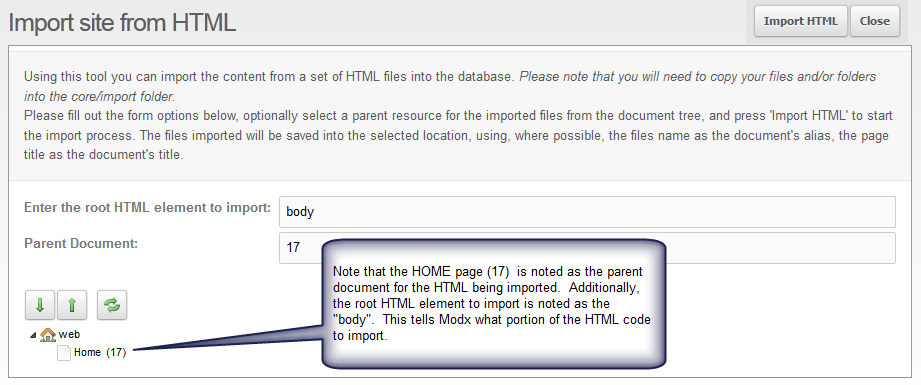
Hover over TOOLS in the menu bar, then click on IMPORT HTML in order to bring up the dialog window shown above. - Click on the field: Enter the root HTML element to import. This tells Modx what portion of the HTML code should be uploaded. In this example this option is set to BODY.
- Click on the PARENT DOCUMENT and then specify the numerical value of the document that represents the web page. In the example above, the parent document is labeled as '17'.
- Next, click on IMPORT HTML in the top right-hand corner.
When the import completes...
When the import is in progress you will see a progress window and alert that displays the import results. It may look like this: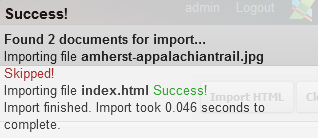
Note that the only file imported was the HTML file. The graphic, though it is definitely a part of the web page, was not included in the import. When the import completes it creates a separate page called DEMO WEB PAGE. You will see this page in the resource tree: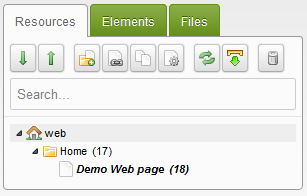
The title of the page comes from the actual TITLE in the HTML code of the page. Additionally, if you were to review the original HTML code, the root HTML element that was imported is only the section of code between the BODY tag as was designated in step 10. You can further verify the code that was imported by clicking on the RESOURCES tab and then clicking on the newly imported page and selecting VIEW. As you can see by this example, integrating parts of HTML from websites is a quick and simple process. With the import capability you can see how it can help to shorten your development time by integrating previously created code.

We value your feedback!
There is a step or detail missing from the instructions.
The information is incorrect or out-of-date.
It does not resolve the question/problem I have.
new! - Enter your name and email address above and we will post your feedback in the comments on this page!