Setting the Zones for Shipping in PrestaShop 1.5
Selecting the zones for shipping may be confused with Shipping option to choose the zone(s) that a Shipper/Carrier can deliver (go to Choose the Zones Where a Carrier is Available in PrestaShop 1.5). The option to select the zones for shipping lets you decide the areas that can be serviced by a selected carrier - basically, this creates the zone list which is used in the interface for choosing where a shipper/carrier will deliver. The following tutorial shows how to define the zones for shipping in PrestaShop 1.5.
Defining the Zones for Shipping in PrestaShop 1.5
- Log in to the PrestaShop Admin Dashboard as an Administrator
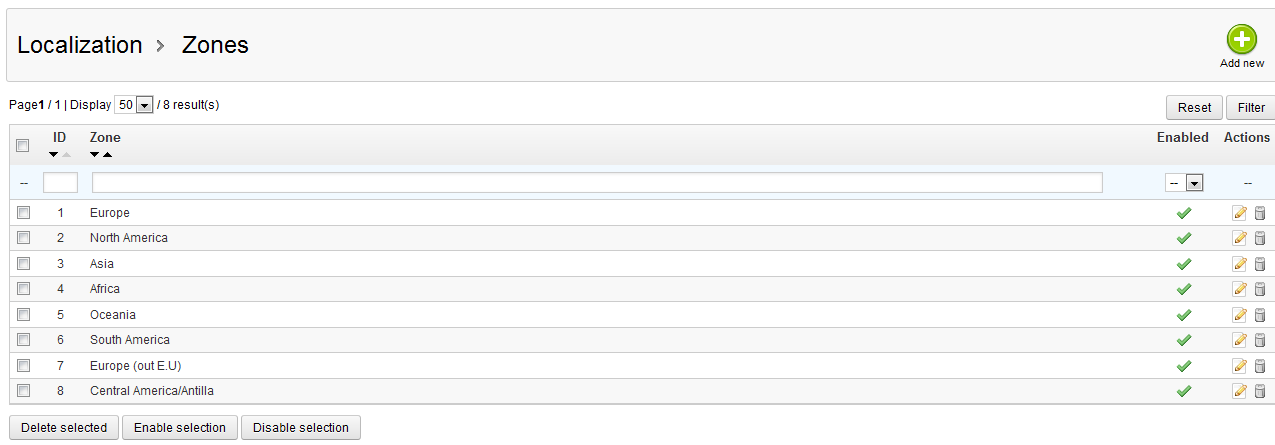
- Hover over the menu bar where it is labeled LOCALIZATION. Click on ZONES when it appears. You will a screen similar to the following:

The options for action here start with the green ADD NEW button in the top right hand corner. The next option shows the number of results you can view. Select DISPLAY with a drop down arrow to select a different number of results. Then click on the FILTER or RESET button on the right hand side to filter your results.
The table of Zones includes the following columns:
ID ID number for the Zone Zone Regional zone name Enabled Indicates if zone is enabled Actions Option to edit or delete zone - To add a new zone, click on ADD NEW in the top right hand corner. If you need to EDIT or DELETE a zone, skip down to STEP 5. After clicking on ADD NEW here's a screenshot of what you will see:

NAME - zone name for the region you wish to define
ACTIVE - Permit shipping by selecting the green checkmark radial button or prohibit shipping in the zone by selecting the red 'x' radial button - Give the new zone you are defining a name and then determine if the zone will be active or not by clicking on green check or red 'x' radial buttons. Active zones can be used by your carriers to deliver your products. Click on SAVE to save your entries.
- In order to EDIT or DELETE a zone, click on the corresponding icon in the ACTION column in the table listing the zones. Clicking on EDIT will bring up the same screen as the ADD NEW button, but it will show a previously defined zone. You can then select whether to change the name or make it active or inactive. After finishing your EDIT, click on SAVE in order to save your entries. To DELETE the zone click on the trash can shaped icon. You can also use the DELETE SELECTED button under the table listing the zones.
- The other options under the table are ENABLE SELECTION and DISABLE SELECTION. Enabling or disabling the option allows you to prohibit shipping in zone without removing the listed zone from the definition of the Zone.
The action buttons underneath the table are DELETE SELECTED, ENABLE SELECTION, and DISABLE SELECTION.
Once you have completed adding the zone, this zone must be added to a carrier in order to be of use. Define zones as needed in order to provide the option to the carriers who provide your shipping service.
Did you find this article helpful?
Tweet
Help Center Login
Advanced Shipping Settings in PrestaShop 1.5
Related Questions
Here are a few questions related to this article that our customers have asked:
Ooops! It looks like there are no questions about this page.
Would you like to ask a question about this page? If so, click the button below!

We value your feedback!
There is a step or detail missing from the instructions.
The information is incorrect or out-of-date.
It does not resolve the question/problem I have.
new! - Enter your name and email address above and we will post your feedback in the comments on this page!