Adding Products to Your PrestaShop Store
Products are the heart of any e-commerce store. In this article we will walk through the basic steps to quickly add products to your store: Creating a New Product, Adding Product Info, and Adding a Product Image.
Please note, while there are many options available when creating and editing products, this article focuses on the most important options you need to configure when adding products in PrestaShop.
Creating a New Product in PrestaShop
- Begin by logging into PrestaShop
- Select the Catalog tab
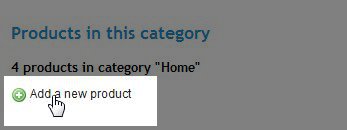
- Scroll down to the Products in this category area
- Click on the link to Add a new product
Next we will add the product information for our new product.
Adding Product Info in PrestaShop
The first tab you will see is the Info tab. This is where we'll enter some basic information for our product. This may be a little overwhelming at first, since there are so many fields, but we will focus on the most important ones so that we can quickly get our new product added to the PrestaShop store. This tab is divided into different areas as follows:
| Product global information | |
|---|---|
| Name | Enter the name for your product |
| Weight | If your shipping will be based on product weight, be sure to enter in the product weight in this field |
| Pricing | |
|---|---|
| Pre-tax retail price | Enter in your product's retail price (before tax) |
| Tax rule | Select the appropriate tax rule for your product from the drop down menu |
| Category | |
|---|---|
| Default category | If your product will be in more than one category, select the default category from the drop down provided. This is the category the product will appear in when someone finds the product through a search |
| Category List | Choose which categories you want the article to appear under. Products can be shown under multiple categories. If you want to feature the product on your shop's home page, be sure to select Home as one of the categories |
| Product Description | |
|---|---|
| Short description | This is the description that shows in the product list and top of product page. |
| Description | This description will be shown in the body of product page under the More Info tab |
| Tags | Enter in tags for your product. These should be words people might enter when performing a search on your site for a product. Be sure to separate tags with commas. |
|---|
Adding a Product Image in PrestaShop
| File | Click the browse button to locate and upload the file from your local computer. |
|---|---|
| Caption | Enter in the caption that will appear under the product image |
| Cover | If you upload more than one image for your product, you will need to select one as the cover. The cover image is the image that displays in the product listings. All images will be available on the individual product's page. |
Click the Save button to save your changes and return to the Catalog page.
Continue adding your products until you have your store's inventory complete. Be sure to test out your site along the way to make sure your products are displayed in the way you want them to be shown. Once you have all of your products set up, you can move on to creating information pages for your site. In PrestaShop, these are referred to as CMS Pages, and we go into more detail about those in our next two articles.


We value your feedback!
There is a step or detail missing from the instructions.
The information is incorrect or out-of-date.
It does not resolve the question/problem I have.
new! - Enter your name and email address above and we will post your feedback in the comments on this page!