Importing a CSV file of Categories into PrestaShop
If your PrestaShop store will contain a large number of categories, you may find it more efficient to import a CSV file of categories rather than creating each category one-by-one in the PrestaShop back office. This tutorial guides you through importing categories into PrestaShop.
Please be sure that your CSV file is properly formatted before beginning the PrestaShop import process. When working with the categories file, check the following:
- Although PrestaShop does not note this, the ID field is required.
- Make sure that the ID you have assigned to your category does not already exist unless you want to overwrite that category in PrestaShop.
- The Name field is required for importing and creating categories.
- By default, all categories are created as sub-categories of the Home category in PrestaShop. If you want to create a category as a subcategory of another category, specify the parent category (by Name or ID) in the Parent Category field.
- To begin importing categories, log into your PrestaShop back office.
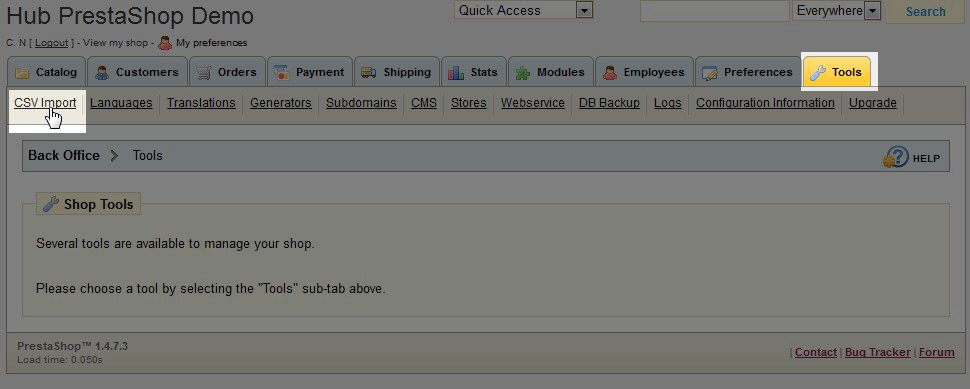
- Click on the Tools tab and click on the CSV Import link.
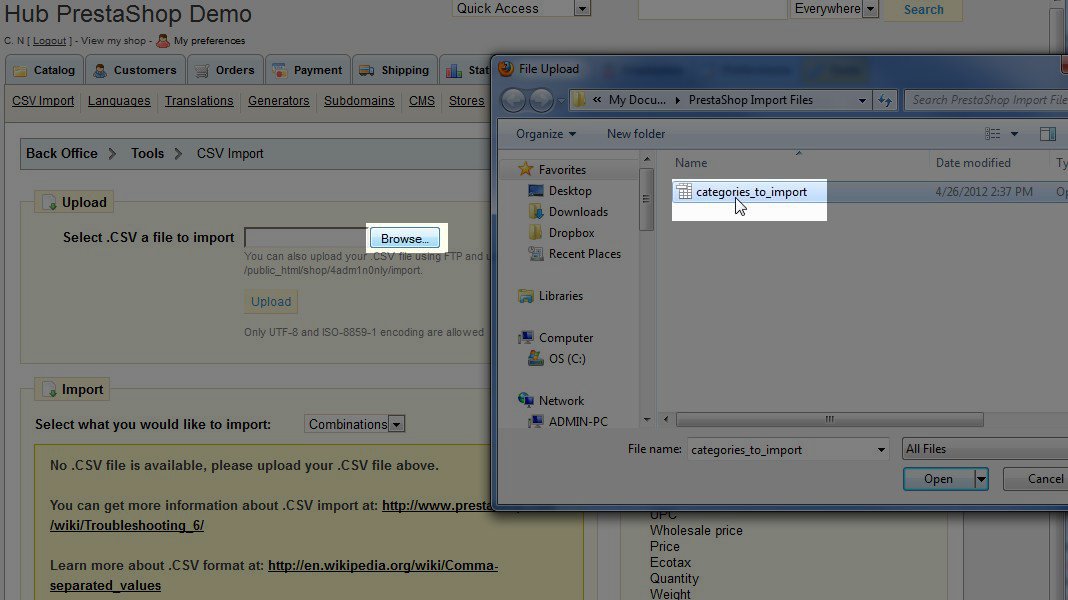
- In the Upload area on the CSV Import page, click the Browse button and double click your CSV file of categories to import.
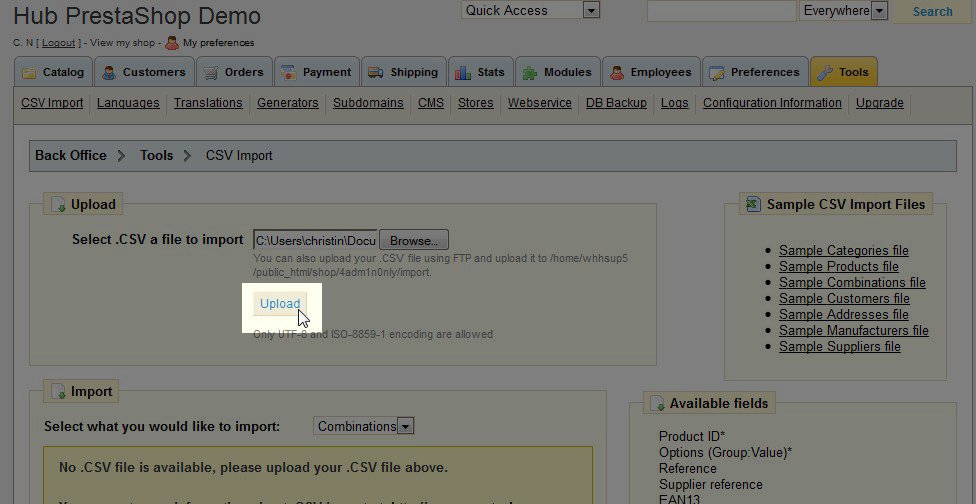
- Click the Upload button.
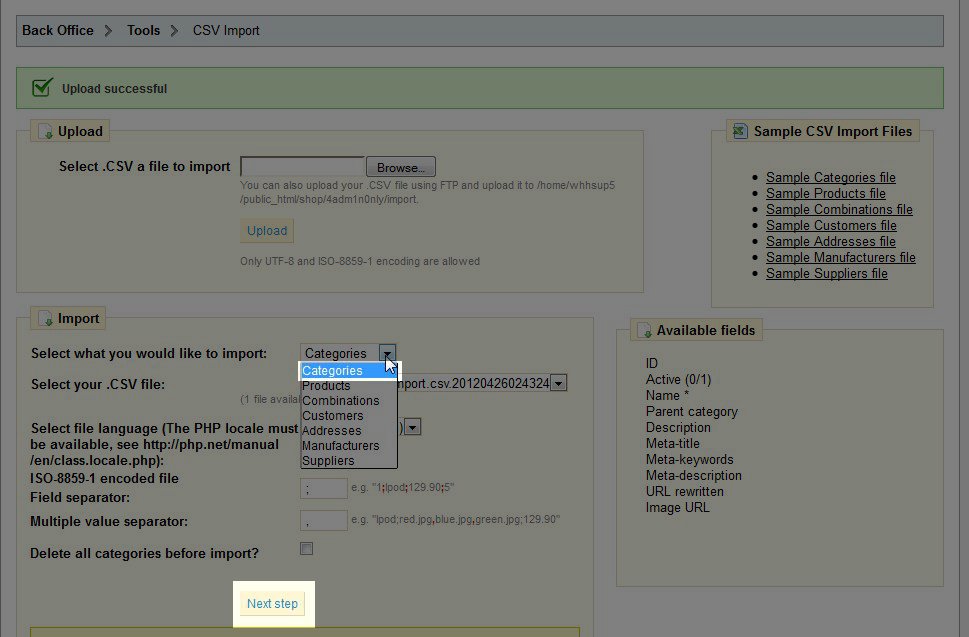
- Under the Import heading, choose Categories for what you would like to import and click Next step.
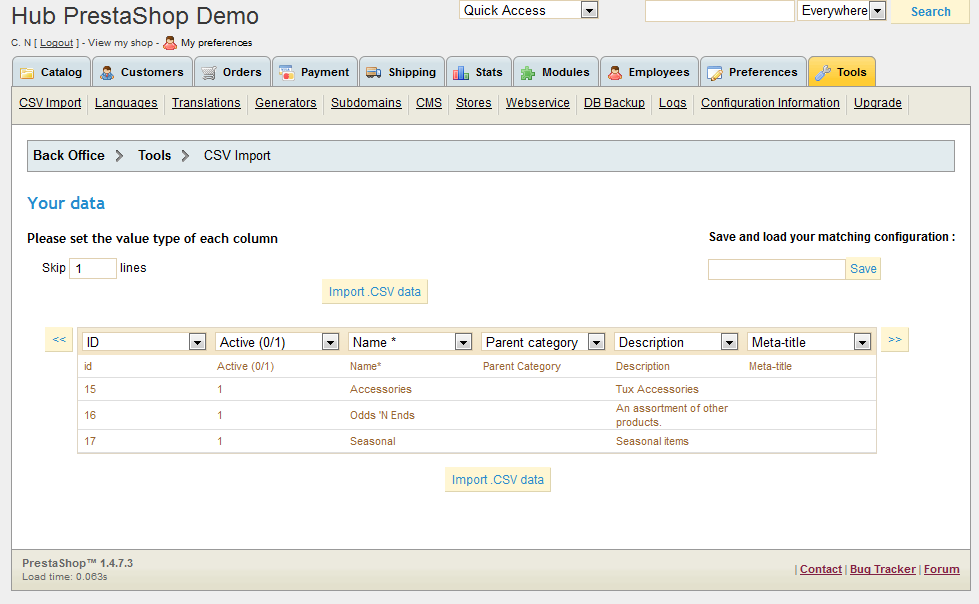
- If your import file contains a header row (most will) input 1 in the Skip lines field provided.
- Make sure the field names (column names) in your CSV file are properly matched to their corresponding field name in PrestaShop (e.g. ID to id, Active to Active, Name to Name, etc.).
- Select Import .CSV data to begin importing your CSV file of PrestaShop categories.
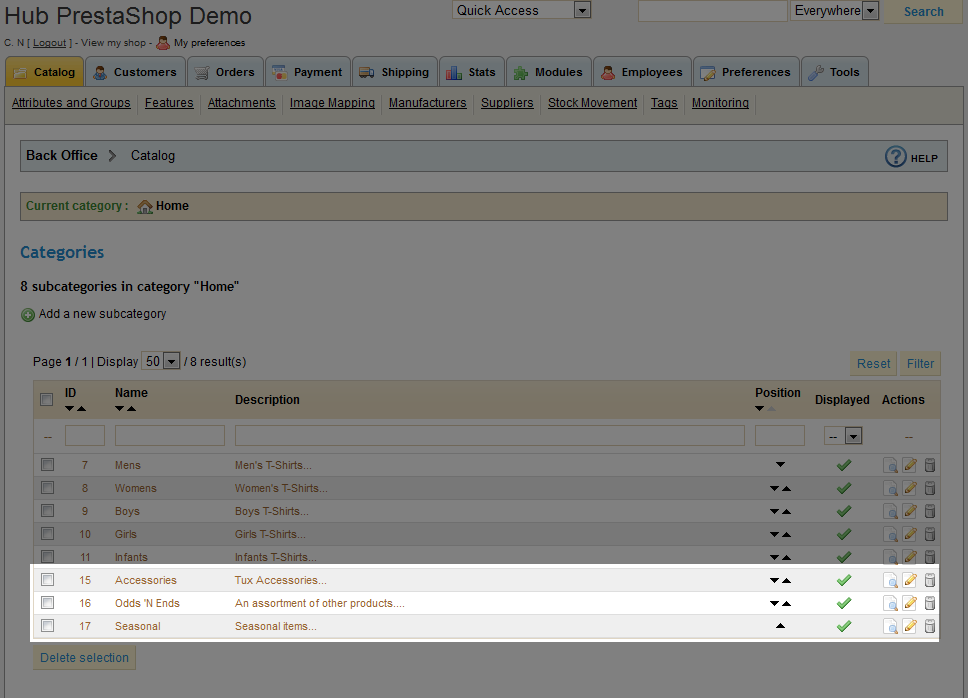
- Verify your categories imported correctly by navigating to the Catalog tab and viewing your new categories. If you imported any subcategories, navigate into the appropriate parent category to view the new subcategories.
Anytime you want to import new categories, simply follow the steps above. If you want to update existing categories (instead of creating new ones), simply input the category ID of the category you want to update in the ID column of your category CSV file.
Did you find this article helpful?
Tweet
Category
PrestaShop CSV Import
Help Center Login
PrestaShop CSV Import
Related Questions
Here are a few questions related to this article that our customers have asked:
Ooops! It looks like there are no questions about this page.
Would you like to ask a question about this page? If so, click the button below!

We value your feedback!
There is a step or detail missing from the instructions.
The information is incorrect or out-of-date.
It does not resolve the question/problem I have.
new! - Enter your name and email address above and we will post your feedback in the comments on this page!