Preparing Files for PrestaShop CSV Import
The most important phase of the process of importing a CSV file into PrestaShop is the file preparation. It is critical that the CSV file be set up properly before attempting to import it into PrestaShop. If your file contains incorrect data or data in the wrong columns, you will either have to make edits in the PrestaShop back office or import a corrected file.
Fortunately, PrestaShop provides sample CSV files to use as a reference when preparing your CSV file for import.
- To download a sample CSV Import File from PrestaShop, begin by logging into your PrestaShop back office.
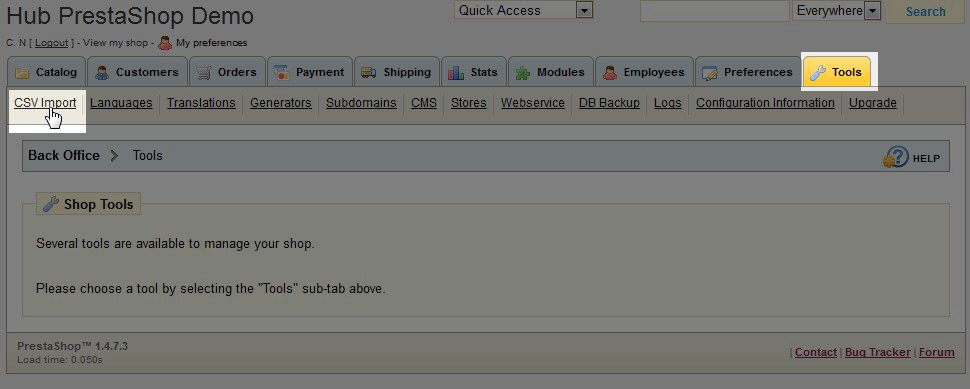
- Click on the Tools tab and click on the CSV Import link.
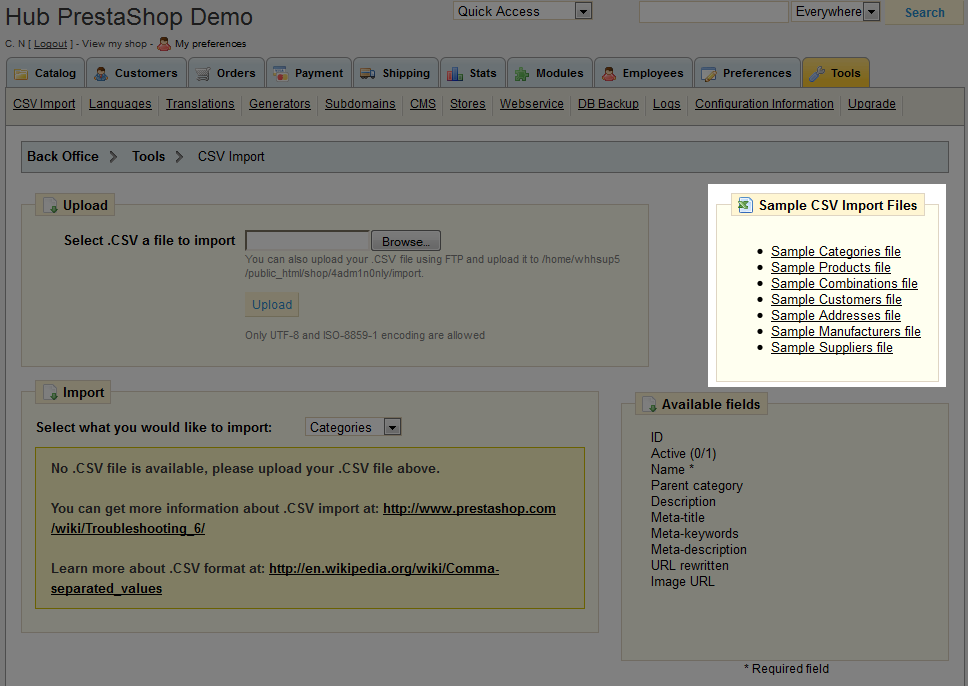
- On the CSV Import page, on the right side you will see a heading for Sample CSV Import Files. Click on the sample file you want to download to your local computer.
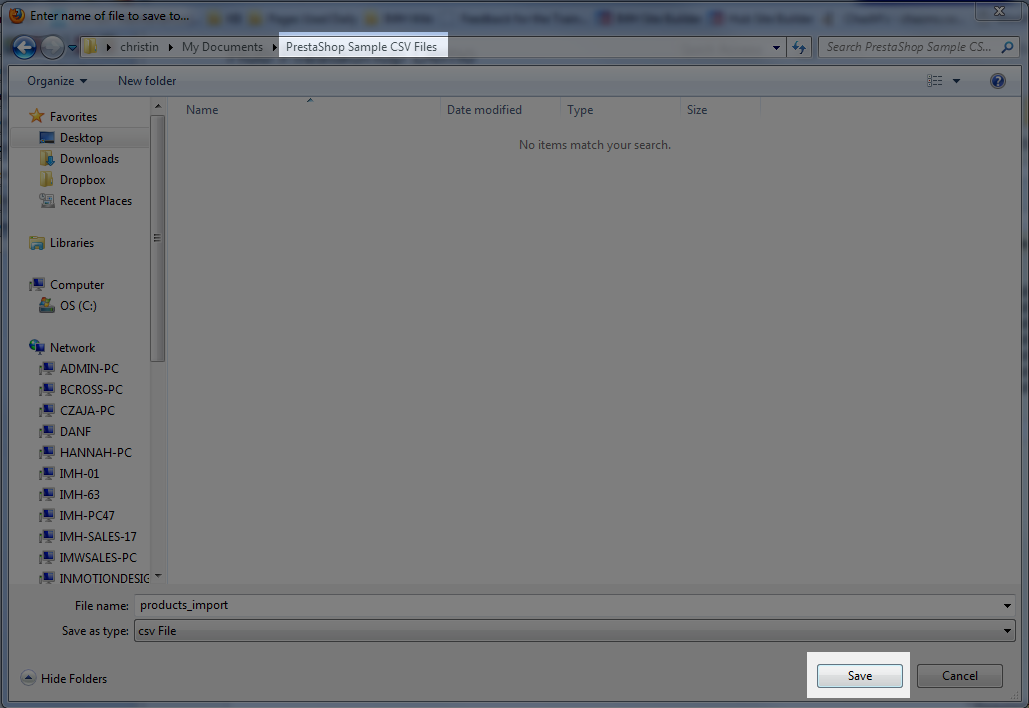
- When saving the PrestaShop sample CSV file, be sure to save the file to a location on your local computer where you can easily find it again. In this example, I created a PrestaShop Sample CSV Files folder in my Documents folder so I can easily find the file later.
- Open the file with your preferred spreadsheet program to view the sample data and how the data is organized and labeled. Note, characters other than commas can be used as a separator in CSV files, and the default separator used in PrestaShop is a semicolon. You should be able to let your spreadsheet determine the separator and place your data into fields when opening the file.
- Once you have the sample CSV file open, you can view the sample data and the field names to use as a reference when you are creating your import file. I find it easiest to save the sample file with a new name, delete the sample data and fill in my own data. That way the CSV field names match PrestaShop and it's easier to import the file later. If you create your own CSV file, use a semicolon to separate fields and a comma to separate multiple values in a field. While this can be changed in PrestaShop during import, it's good practice to use the default PrestaShop settings.
Here are some points to remember about some of the important fields in the PrestaShop CSV data files:
- In all files, an asterisk (*) refers to a required field.
- Some files contain an Active field: 0 = not active, 1 = active
- The product file contains a Category field to assign a product to a category (or categories) during import. The category (or categories) should be identified by name (not ID as was the case in previous PrestaShop installations).
- In the product file, if you want to assign a product to multiple categories, separate the category names with a comma (,) in the Category field.
- In the product file, if you do not assign a category for a product, it will be automatically assigned to the Home category in PrestaShop.
Did you find this article helpful?
Tweet
Category
PrestaShop CSV Import
Help Center Login
PrestaShop CSV Import
Related Questions
Here are a few questions related to this article that our customers have asked:
Ooops! It looks like there are no questions about this page.
Would you like to ask a question about this page? If so, click the button below!


We value your feedback!
There is a step or detail missing from the instructions.
The information is incorrect or out-of-date.
It does not resolve the question/problem I have.
new! - Enter your name and email address above and we will post your feedback in the comments on this page!