Manually Updating Contao Installations
 Contao is regularly maintained by the Contao non-profit organization and you can automatically upgrade your installation but you will need to have a Contao Live Update ID. This is a paid subscription service that you can obtain here. You also can update Contao manually, but you will need a file transfer program such as FileZilla. For more information on FileZilla, go to Using FileZilla to FTP to your Account. The following article explains how to update Contao using the FileZilla FTP client.
Using FileZilla to Update your Contao Installation
- Before you begin any update to your Contao installation, make sure to run a backup of the entire installation directory. This way, you can recover the files if anything goes amiss. For more information on making backups, please go to Creating a Website Backup in your Cpanel, or use a FTP client like FileZilla to backup your files. You can find information on backing with FTP here: How do I Create a Backup using FTP?
- Next, you will need to obtain the latest installation files from Contao here: Download Contao Open Source CMS. Download the zipped version of the file.
- Uncompress the zipped file and by default, the compressed file will extract to a folder called "contao-3.0.x".
- Open FileZilla and log into your web server.
 In the left-hand side of FileZilla you will see the file listings on your local computer. Find the Contao files that you uncompressed earlier and then drag-and-drop them into the Contao installation folder at right.
 FileZilla will note when you have differences in file version and show a dialog screen saying Target file already exists. You will see the screenshot at right. As per the screenshot, select OVERWRITE IF DIFFERENT SIZE OR SOURCE NEWER, then click on OK in order to proceed.
Note: The duplicate files exist because you are manually copying the files over from the newer version to the older.
- After you have selected OK, the dialog screen labeled Target file already exists will be cleared and then FileZilla will proceed to transfer the files. If you do not wish to confirm each time FileZilla finds a duplicate file, then click on the option beneath the action section (in the Target file already exists dialog window) that says Always use this action. You can choose use this option so that it runs only on this transfer, or for all uploads. If want to view every file overwrite, then you will need to click on OK everytime that duplicate file exists.
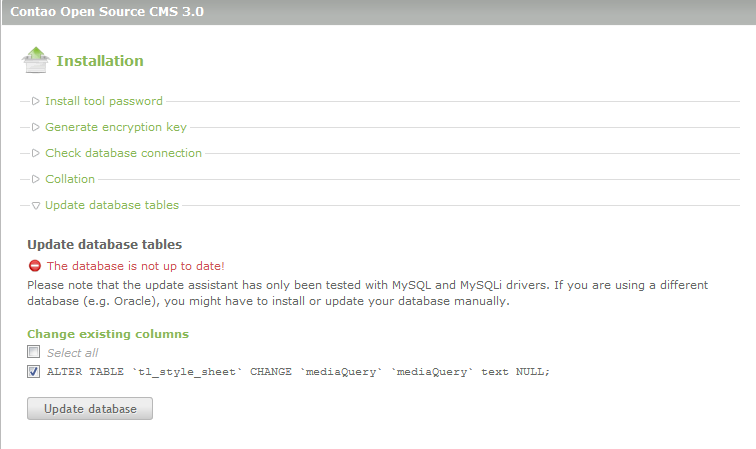
- After the files have been transferred, you will need to run the INSTALLATION.PHP file in order to update the database. The path will be similar to what you used when installing Contao. The file format may look like this:
http://contaotestsite.com/install.php
This path into the browser and you will see the following window appear:
- Click on UPDATE DATABASE in order to finish the manual update process.
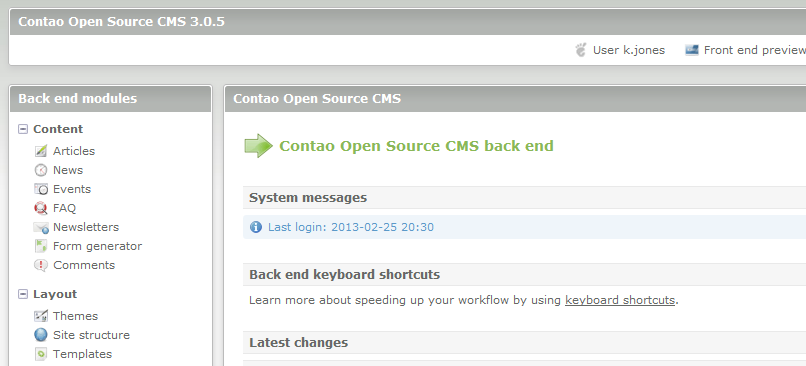
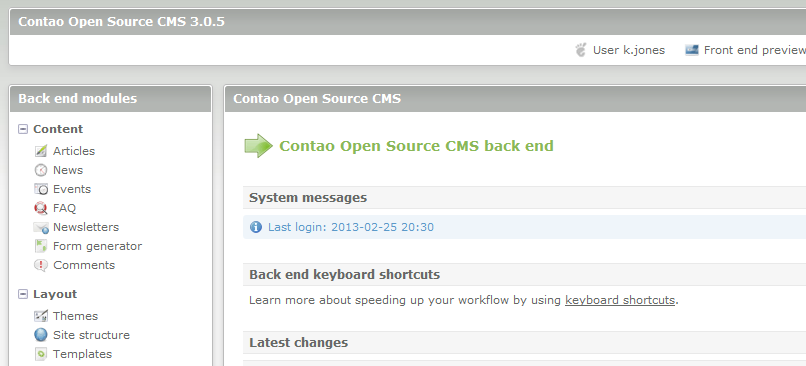
This will complete the update process. Make sure to check the back end to verify that it is operating correctly. If you have a bunch of add-ons, some may require re-installation, but check to make sure that everything is operational. The manual update requires a little movement of files, but can be done quickly using an FTP client such as FileZilla. The following screenshots shows the upgrade in the site after manually updating the files:
| Prior to Manual Update | After the completion of the update |
|---|---|
 |
 |

We value your feedback!
There is a step or detail missing from the instructions.
The information is incorrect or out-of-date.
It does not resolve the question/problem I have.
new! - Enter your name and email address above and we will post your feedback in the comments on this page!