Quick Start to Using a Snippet in Modx
Dynamic webpages that have information that needs to change on the fly can be made with Modx snippets. Snippets are basically portions of code that can provide menus, listings, form-functionality and other content that may need to be easily modified. In order to create a snippet you will need to have some knowledge of coding with PHP. We are not going to explain all the various ways to code a snippet, but in order to show how this process works, we are going to create a simple example of a snippet using some very basic PHP code. The following article explains how to create a snippet within the Modx Administrator dashboard.
Creating a Simple Modx Snippet
Creating the Snippet
- Login to the Administrator Dashboard for Modx.
- Click on the ELEMENTS tab of the Resource Tree in the left portion of the screen.
- When you hover over the icons at the top of the resource tree, you will see a text pop-up. The NEW SNIPPET icon is third to last icon going from left to right. You can also right-click on the SNIPPETS icon that is labeled in the tree below. This will bring up a drop-down menu that allows you to select NEW SNIPPET.
- A form will appear for the new snippet. There are two tabs at the top of the form: Create/Edit Snippet and Properties. We will be focusing primarily on just the Create/Edit Snippet tab. Remember that snippets are basically PHP code so they can have many functions for your Modx website. However, for this tutorial we're simply going to create simple snippet so that you can see the different steps involved in creating a snippet. Click on the NAME field and type in a name for the snippet: testsnippet.
- Click in the DESCRIPTION field and give the snippet a short description.
- Leave the values at the right of the new snippet form set to their default value. The CATEGORY defaults to '0' because it is not categorized. The other unchanged options include 'Lock snippet for editing', 'Clear cache on save (checked)', and 'is Static'.
- The meat of the new snippet form is the SNIPPET CODE (PHP). All the code should begin with '<?php' and then end with '?>'. For the purpose of this tutorial we will only create a simple output file using the following code:
<?php
$output="<p>A simple website<br />
Bits of words and pictures make<br />
Something with nothing</p>";
return $output;
?> - When you have finished copying the code into your snippet, click on SAVE in the top right hand corner of the screen.
Using the Snippet
Now that you have finished creating the snippet, how is it used within a Modx website page? The answer is to use the snippet with a simple tag in a Modx page. To see another tag being used in a tutorial, see How to Use a Chunk Tag in Modx.
- Click on the RESOURCE tab in the resource tree.
- Left-click to select the web page you wish to edit in the resource tree. This will bring up the web page on the right. Scroll down until you see the content of the page in the editor.
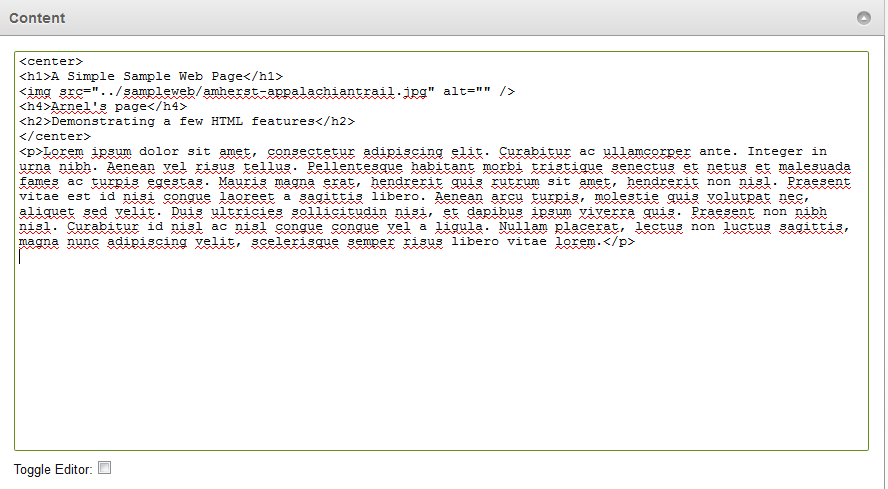
- Since the editor I am using is using a different editor, we will want to toggle the editor (the TinyMCE editor) off. This can be done at the bottom of left of the screen with the option labeled "Toggle Editor". Uncheck "Toggle Editor" so that we can see the code on the page. Here's a screenshot of what you may see:

- Next, I added the following code:
<p>My Haiku of the Day:</p>
Note that the snippet I created was named "testsnippet" (names for snippets are case sensitive, so be sure to spell it correctly). The snippet is placed in this format [[snippetname]].
<p>[[testsnippet]]</p> - Click on the SAVE button in the top right-hand corner again.
This completes the addition of the snippet to the web page. To see how the added code affects the page, check out the screenshots below:
 |
 |
The screenshots above show the result of adding the snippet to the page. You can see the small paragraph added in the screenshot on right.

We value your feedback!
There is a step or detail missing from the instructions.
The information is incorrect or out-of-date.
It does not resolve the question/problem I have.
new! - Enter your name and email address above and we will post your feedback in the comments on this page!