How to Use Image Mapping in PrestaShop 1.5
Image mapping is used to produce hot spots on the a photo or graphic that would be displayed for a product. The hotspot produced for the image would be used to convey information on the product when the mouse pointer hovers the spot. The following tutorial will show you how to use hotspots for products in your PrestaShop 1.5 installation.
Creating Hotspots for Products in PrestaShop 1.5
- Login as an Administrator then go to the Menu Bar and hover over CATALOG.
- Select IMAGE MAPPING when the drop-down menu appears and you will see the following:

If you have products with image mapping already set, then you will see a list here. To edit a product, click on the EDIT button at the far right hand side of the screen. Or, click on ADD NEW in order to add a new mapped image for a product. Clicking on the ADD NEW button will bring up this screen:
Prestashop also provides you the directions on how to map products in the image. However, we will break it down in to a short graphical segment. - You first need to name the image you are using for the product. This is a required part of the image map. The option to use this image is given by the next selection item labeled as STATUS. By default, the STATUS is set to enabled, but if you're waiting on the image or if you need to disable it, select the 'x' in order to disable it.
- Type in the name of the image, or select the BROWSE button to find the graphic/photo that you intend to use. Note that there is a size limit on the photo. PrestaShop is limited to the following:
JPG, GIF or PNG file formats only
131072 KB file size
556 x 200 px (width x height)
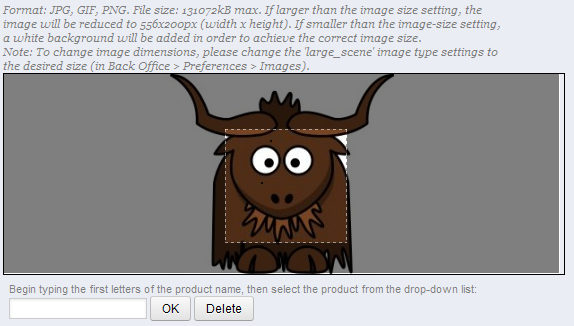
If the graphic or photo is smaller, then a white border (background) will be added that will bring the image to the correct size. NOTE: If you wish to change the image dimensions, you will need to find the 'large-scene' image type settings in PREFERENCES -> IMAGES. - When you add a picture, it will appear in a box as per the one below:

With your mouse pointer, click and hold and drag to create a square/rectangular area for the hotspot. The area that you highlight (as shown above) will be the area where hovering over the image with the mouse will produce a text description of the product. - To identify the product for with the image has been mapped, start typing the first few letters of the product in the box below the image. Click OK when you see the product appear.
- The next section is for an alternative thumbnail. If you don't want to use the generated image based on the image above, then select BROWSE in order to select an alternative thumbnail graphic.

Note again that Prestashop gives you the file limits on file format and file size. The file size limit for the thumbnail is 161 x 58 pixels. These dimensions can be changed in the PREFERENCES under IMAGES. - Once you have finished with both the main image and the thumbnail, select SAVE in the top right hand corner to preserver your entries
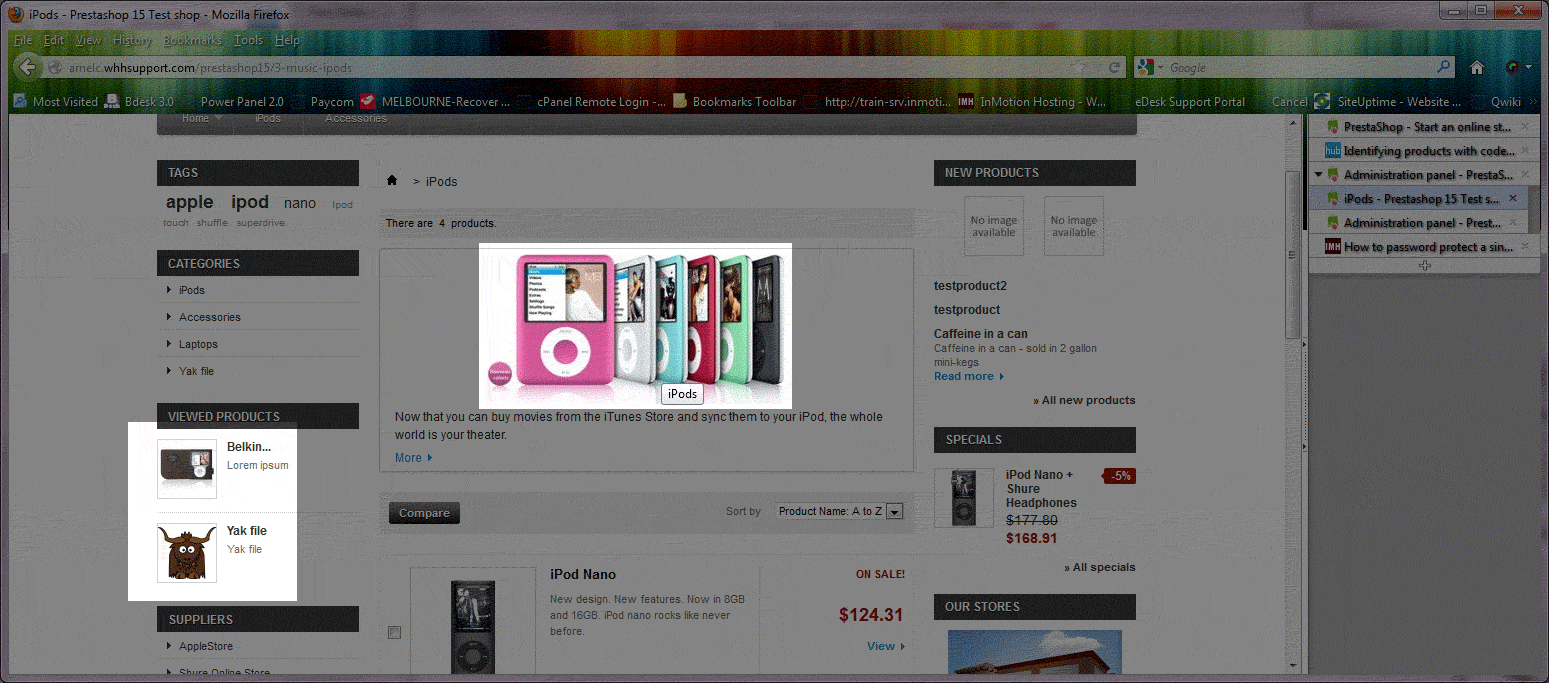
The image used in your shop can be very important to your customers. Image mapping allows you to identify the graphic and control what is being used to represent your products in the store. Here's an example where the main graphic is used in the front of store (for the IPOD) showing a small description that pops up when the mouse is held over the product. A thumbnail graphic is used in the recently viewed products.

We value your feedback!
There is a step or detail missing from the instructions.
The information is incorrect or out-of-date.
It does not resolve the question/problem I have.
new! - Enter your name and email address above and we will post your feedback in the comments on this page!