Creating a Newsletter in Contao
Another feature of Contao is its ability to create newsletters. The Contao newsletter function makes it quick and easy to create the newsletter. The following tutorial will guide you through the steps in creating the newsletter and give you a brief description of the options using the Contao back end interface. If you are interested in assigning previously created newsletters to users, please go to Creating Subscriptions to Contao Newsletters.
Making a Contao Newsletter
- Login to the Contao Back end interface as an administrator.
- Scroll down the interface on the lefthand side and click on Newsletters.

Click on NEW CHANNEL. - Name the new channel that you create by filling in the TITLE field. Click on SAVE AND CLOSE.
- Click on the edit icon (which looks like a pencil - it will be the first icon to the left of the group of icons on same line as the name of the new channel). This will open up the new channel that you just created. You can create a newsletter, orfve In the top right corner, click on NEW NEWSLETTER.
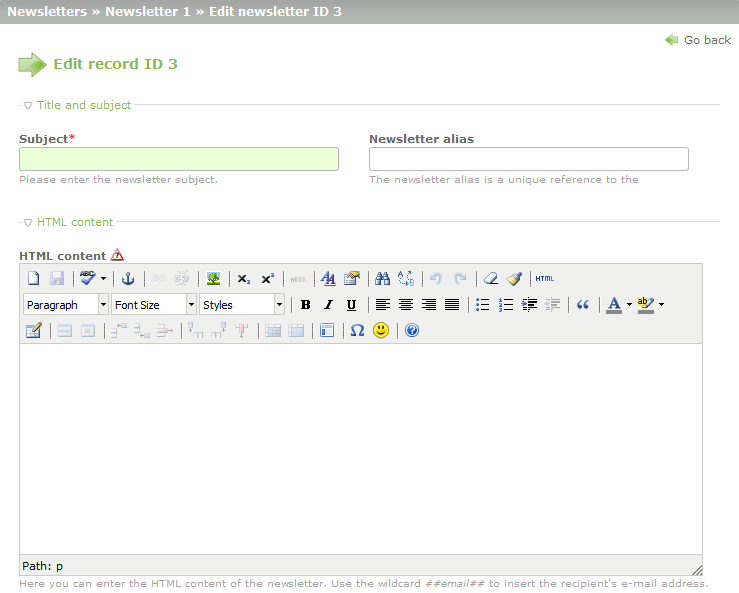
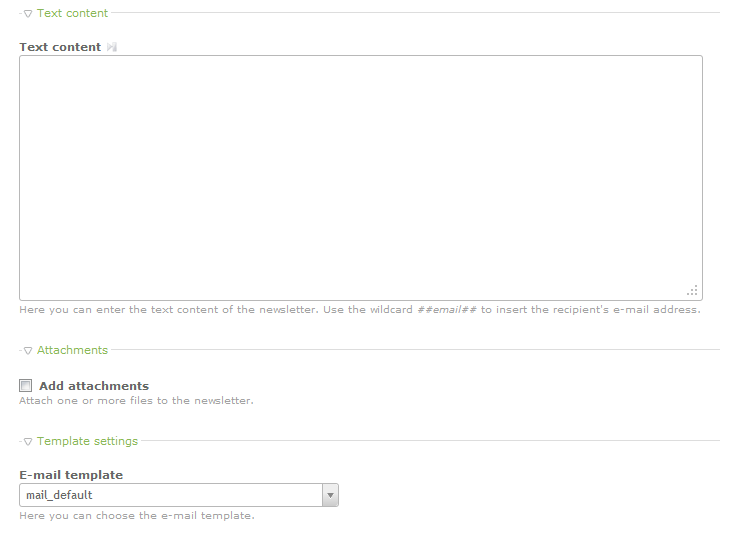
- You will see the form for the new newsletter. To describe the form clearly, it will be broken into three pieces:

Click on SUBJECT and give the newsletter a name. In this section you can add HTML content. The editor allows a variety of content and formats. Scroll down to the next section that starts with the TEXT CONTENT. - The next section for creating the Contao newsletter will usually start with the TEXT CONTENT editor. If you do not see the editor, look for the words "Text content", then click on the arrow beside it so that it is pointing down. When it opens you will see a large blank rectangle where you can paste your text content. The other options in this section include ATTACHMENTS and template settings (mail_default is the default template).

Scroll down to the third part of the form starting with the EXPERT SETTINGS. - In this third part form you will see the EXPERT SETTINGS that include the options to SEND AS PLAIN TEXT, EXTERNAL IMAGES, SENDER NAME, SENDER ADDRESS and the Save options.

Select the options you wish to use, or ignore them for now and click on SAVE AND CLOSE.
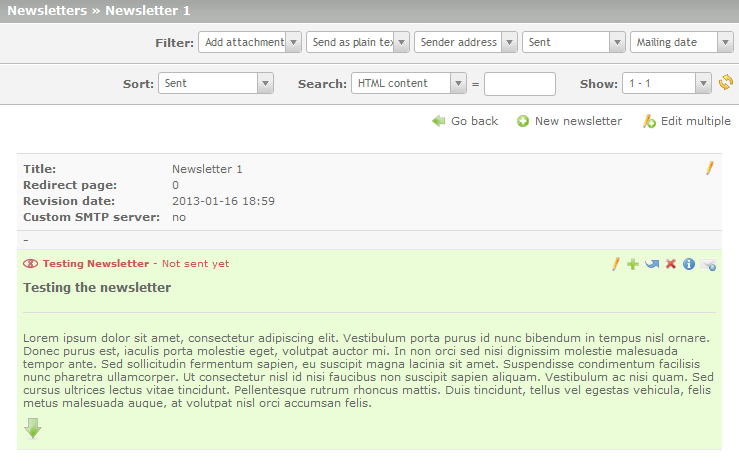
At this point, the newsletter will be complete. If you wish to go back and make more changes, simply click on the edit icon for the newsletter and you can edit the newsletter form again. If you look at the newsletter list at this point, you should see something like the following:
You can see from the screenshot above that there is a clear indication that the newsletter has not been sent yet. In order to find more information on how to assign and send the newsletter to your member or users, please go to Creating Subscriptions to Contao Newsletters.

We value your feedback!
There is a step or detail missing from the instructions.
The information is incorrect or out-of-date.
It does not resolve the question/problem I have.
new! - Enter your name and email address above and we will post your feedback in the comments on this page!