Setting up the Contao Calendar
Contao includes a number of built-in function modules that help to make certain tasks easier to accomplish. The Contao Calendar is one of these options. It can be quickly setup to appear on a page within the Front end Site Structure with only a few requirements. The following article shows how to setup the calendar using the Contao back end interface.
How to Add the Contao Calendar
- Login to the Contao Back end
- Scroll down the left hand side and then click on Site Structure. If you do not see the website structure displayed completely, click on TOGGLE ALL in the top right hand corner to expand the site structure so that you see it as per the following screenshot:
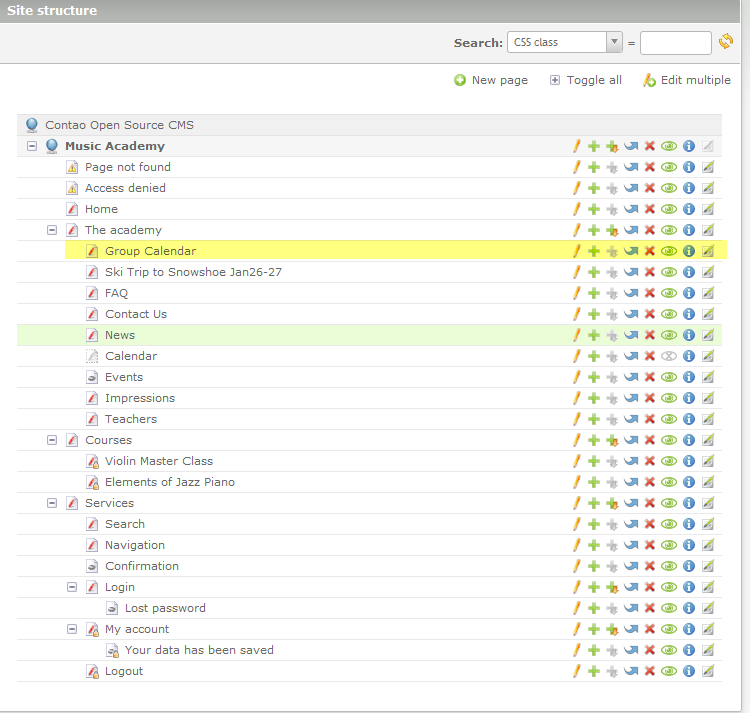
For the purposes of this tutorial, we are going to create a GROUP CALENDAR that can show the Contao Calendar module that comes with this theme. Click on NEW PAGE in the top right hand corner. - When creating a new page in the site structure, you will first be required to position the page within the site structure. Here's a screenshot that shows what you may see:
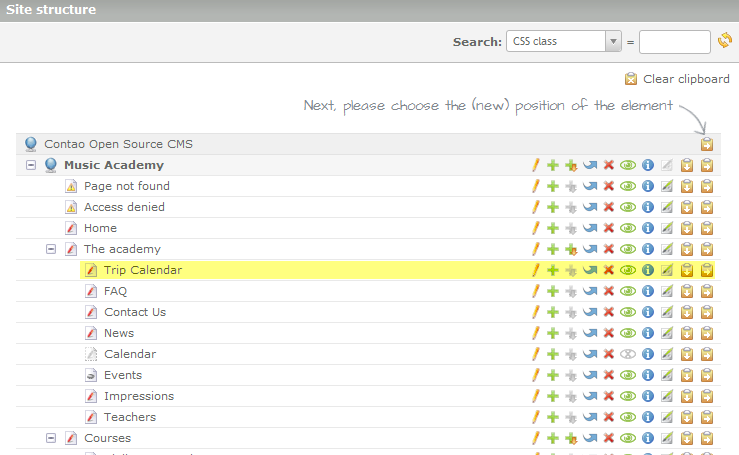
As per the screenshot above, click on the clipboards to position the new page. The highlighted page indicates where the page would appear if you were to click on the clipboard (with the arrow pointing to the right) for "The academy". If you are dissatisfied with the position of the new page, you can click on the blue arrow icon and then move the page to a different location as necessary. For the purpose of this tutorial go ahead and position the page so that it is in "The academy" group as per above. - When the form for the new page appears, fill in the title field and make sure that the PUBLISH PAGE option has been checked off.
- Click on SAVE AND CLOSE.
- When the new page is created, it will be displayed in the tree structure. Click on the title of the page in the tree view to isolate it. You should see it appear like this:

Last icon on the right is the icon to edit the articles of the page (hovering over it will show "EDIT THE ARTICLES OF PAGE ID ##"). Click on this icon and you will see GROUP CALENDAR [Main Column] appear. - When you see the Group Calendar Article appear, it will have the usual group of icons on the right. Click on the first icon to edit the article (click on the icon that resembles a pencil).
- In the next screen that appears, click on NEW ELEMENT in the top right corner to proceed. You will then see the following screen to position the new element:
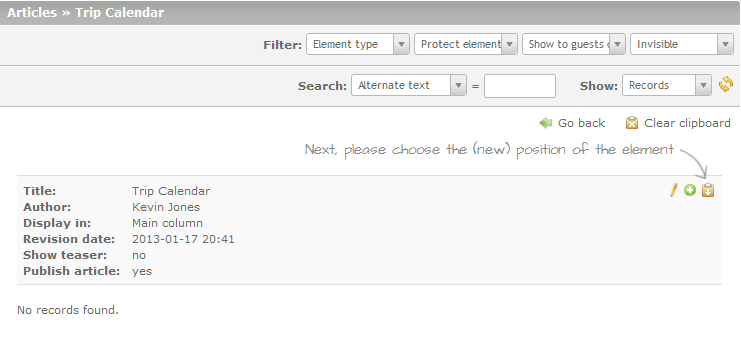
Click on the clipboard (with the arrow pointing down). - The next screen you will see is the form for creating the new element. The following screenshots will walk you through the settings for setting up the calendar module:
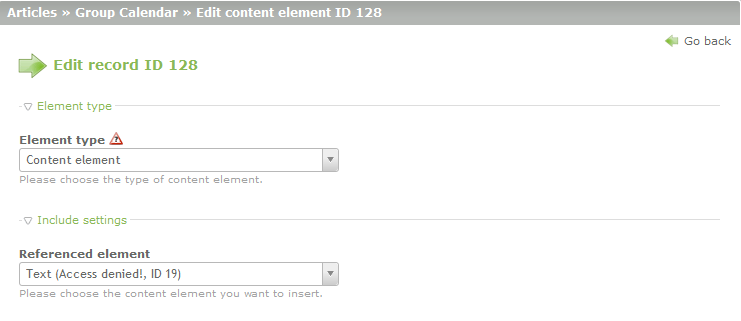
Click on the drop-down menu for the ELEMENT TYPE and scroll down until you find CONTENT ELEMENT. Click on it to choose it. When you select it, you will see the menu change. The next drop-down menu will say REFERENCED ELEMENT. - Next, click on the drop-down menu for the REFERENCED ELEMENT and scroll down until you see MODULE (CALENDAR-CALENDAR, ID 53). Select it and then scroll to the bottom of the page and click on SAVE AND CLOSE.
Modifying the Calendar Options within the Theme
There is one last thing will need to be done in order to make sure that the Calendar appears correctly. The theme will need to be set so that that the calendar functionality will work and show the calendar that you create.
- In the Back End Modules along the left hand side, click on THEMES. If these steps are not completed you will NOT see your calendar appear.
- When you click on THEMES you will see the following screen:
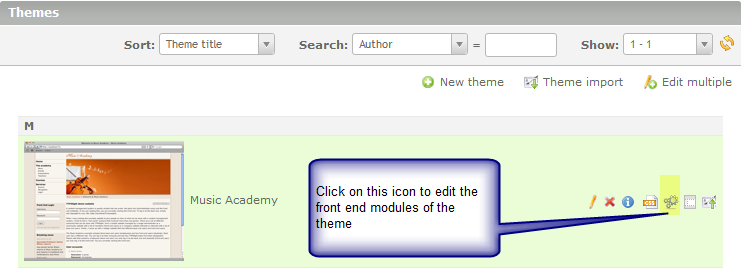
As per the screenshot above, click on the fifth icon to the right. Hover over it and it will show "Edit the front end modules of theme ID 1". - When you click on the icon to edit the front end theme, you will see the following list:
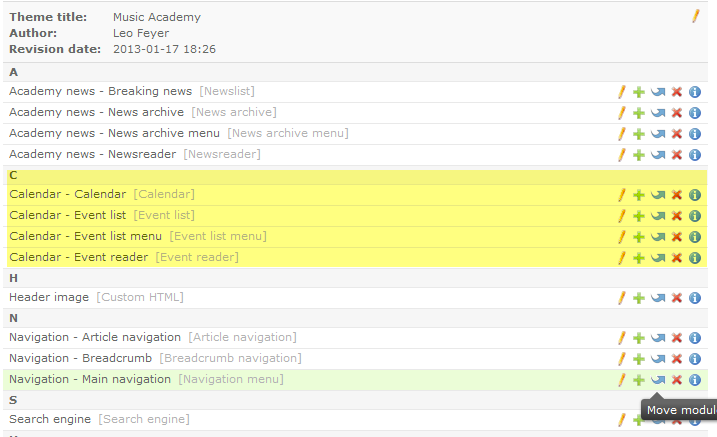
The items that require change are the Calendar entries. They are highlighted above. Click on the edit icon (the icon that resembles a pencil) for each highlighted item above. - For each calendar item in the list (there are four as per the screenshot above), look for the Module Configuration Section and the Calendars checklist. It will appear as follows:
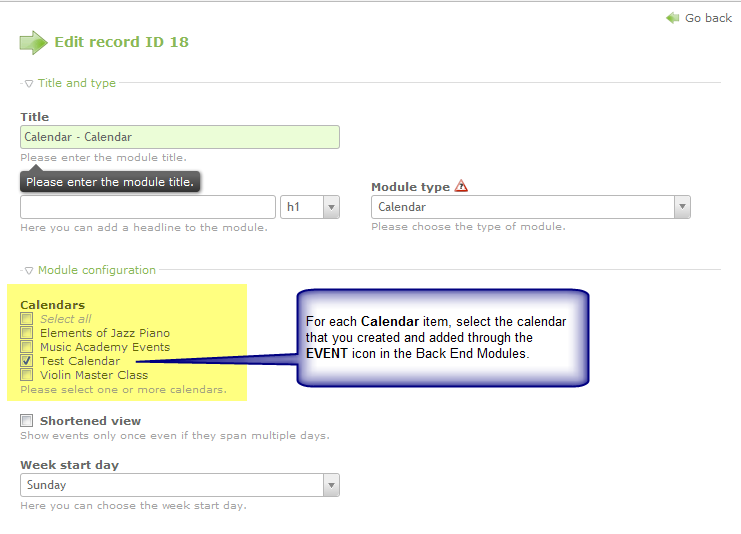
Once all of the Calendar entries have been modified in the theme, then click on SAVE AND CLOSE.
This will complete the process of adding the calendar module to the Site Structure. Here's how it will appear on the front page. The page structure will be clickable within the menu, and selecting it will display the calendar in the main page: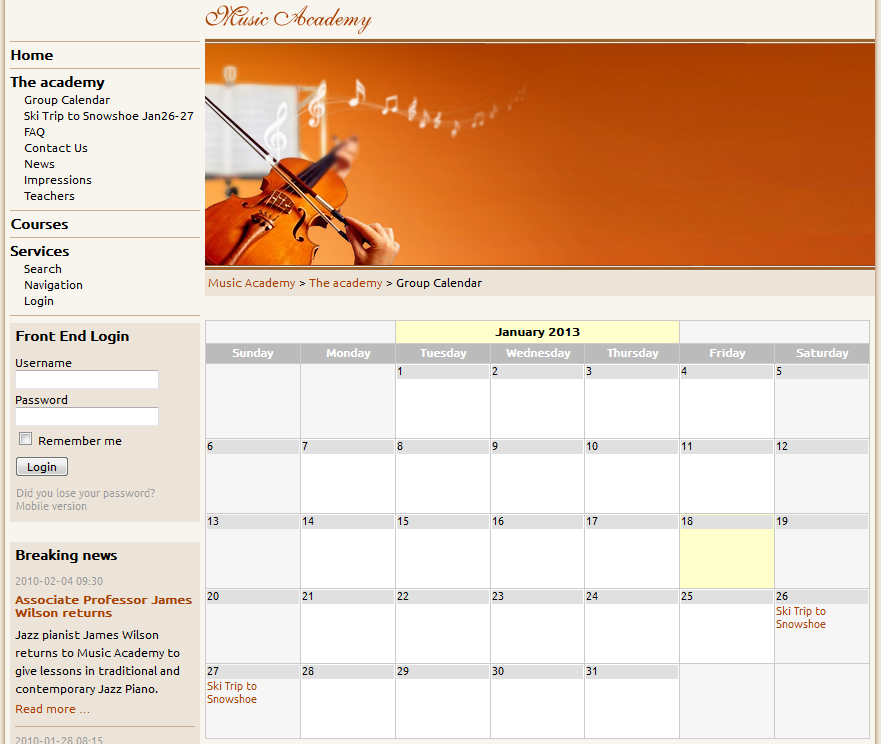
The screenshot above shows the page added to the menu structure and the calendar module in action. The next step in adding a calendar is to create events that can be listed on it. For more information on creating events, please go to Creating Events in the Contao Calendar.

We value your feedback!
There is a step or detail missing from the instructions.
The information is incorrect or out-of-date.
It does not resolve the question/problem I have.
new! - Enter your name and email address above and we will post your feedback in the comments on this page!