How to add or remove stores to a category name in OpenCart 1.5
OpenCart can be used to manage multiple stores and the inventory shared between them. It may often be required for you to identify that the category name will be available in more than one store. The following tutorial guides through the process of adding or removing stores managed in OpenCart with the category name.
Adding or Removing Stores to Category Names in OpenCart 1.5
- Login to the Administration Dashboard as an Administrator
- Hover over the menu item labeled CATALOG, then click on CATEGORIES
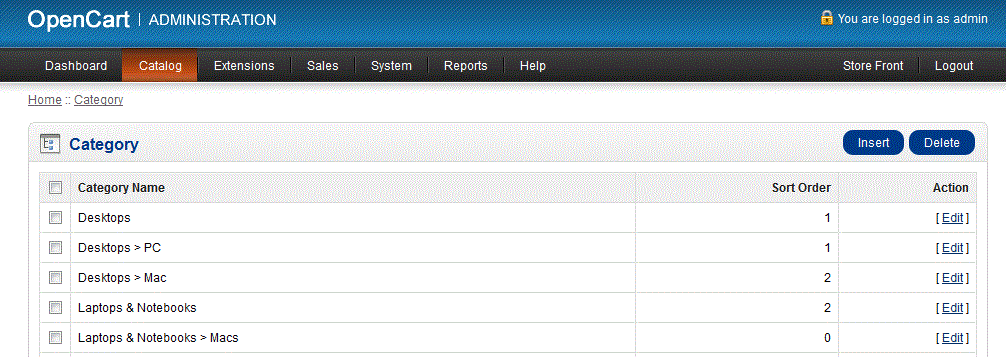
- When you click on Categories if you have existing products in your inventory, you will get a list of products as appears in the screenshot below:
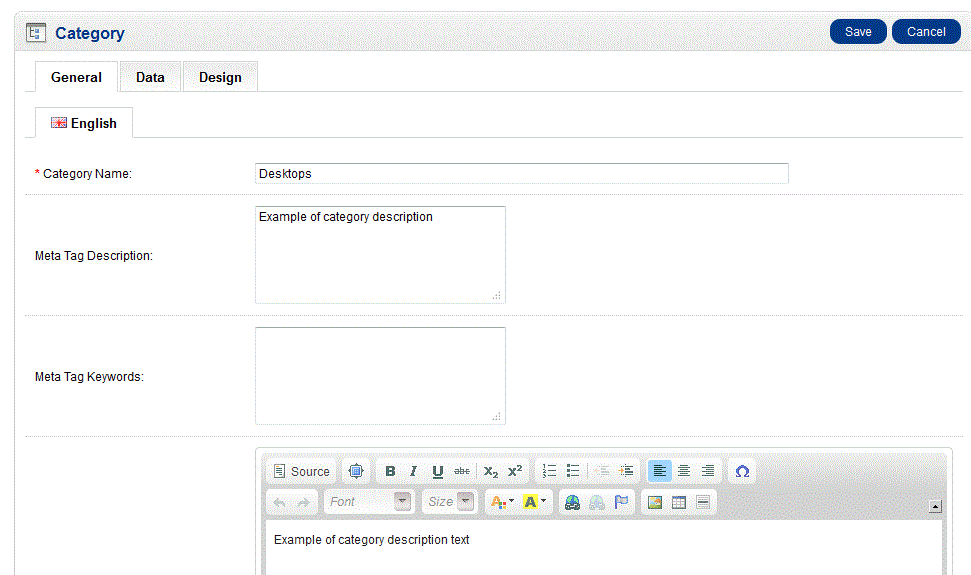
- Click on a category name or select INSERT to create a new category. When the next window opens, it will show you the following:

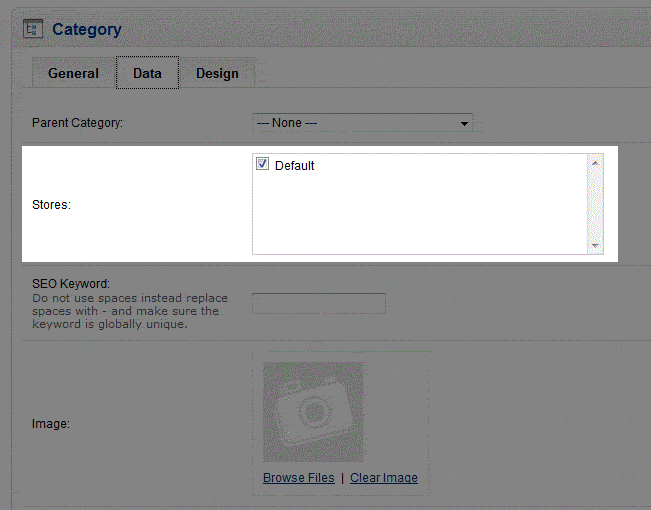
- Select the middle tab that is labeled DATA, then scroll down slightly to get to STORES (the second entry)

- If there is more than one store setup within your Opencart installation, you will see them listed in this box. By default, the DEFAULT store is selected. You can select other stores by simply clicking in their respective boxes. Remove the checkmark when you want to remove the Category name from that store
- Once you have completed adding or removing stores that you want associated with this CATEGORY NAME, then select SAVE in the top right corner to save your selection
One way to broadly control inventory of products within a store is to manage the category names that will be available per store. Carefully review your store products if you have multiple stores and intend to keep the category name available in each location. For more information on adding a new category, please go to Overview of Setting Up Categories in the Catalog for OpenCart 1.5.
Did you find this article helpful?
Tweet
Help Center Login
Catalog Categories and Options for OpenCart
Related Questions
Here are a few questions related to this article that our customers have asked:
Ooops! It looks like there are no questions about this page.
Would you like to ask a question about this page? If so, click the button below!


We value your feedback!
There is a step or detail missing from the instructions.
The information is incorrect or out-of-date.
It does not resolve the question/problem I have.
new! - Enter your name and email address above and we will post your feedback in the comments on this page!