How to Manually Install Boldgrid
BoldGrid can be easily installed onto an existing installation of WordPress. Use the following directions to obtain the plugin files and quickly install it on your WordPress site.
How to Obtain the BoldGrid Plugin Files
- Login to your Account Management Panel (AMP)
-
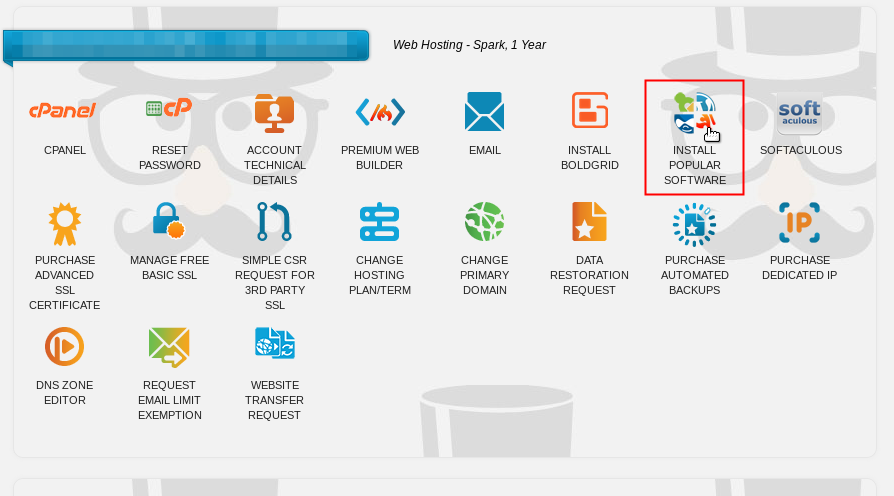
Click on Install Popular Software icon
-
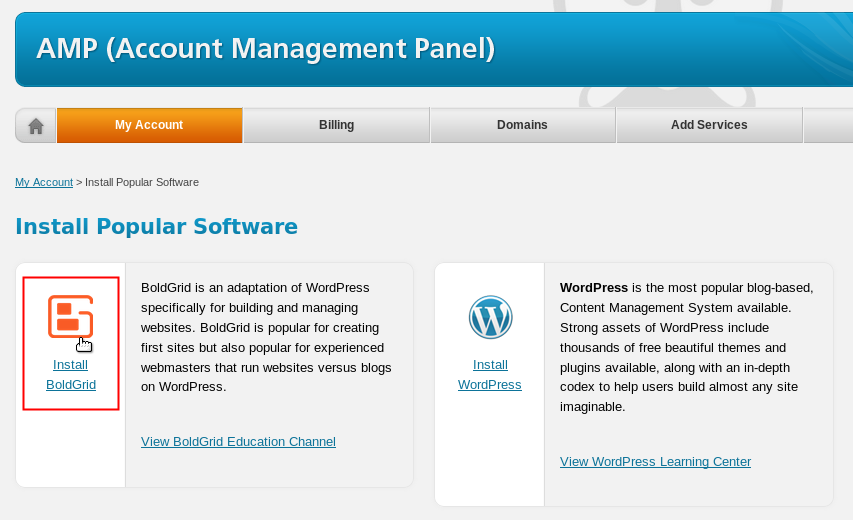
Click on Install BoldGrid. On the next screen, click on "I already have a WordPress site".
-
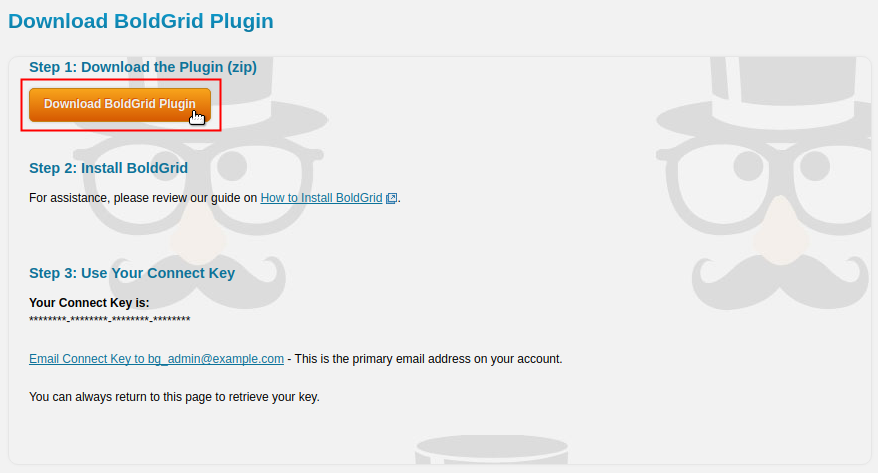
You will then see a screen which displays a button for downloading the BoldGrid plugin. Click on the Download BoldGrid Plugin button to begin downloading the file. Make sure to remember where you save the file.
Copy your Connect Key, you will need the key during the installation of the plugin.
This completes the first part for the manual installation process. The next part involves installing the plugin in WordPress.
How to Manually Install BoldGrid
- Log into the WordPress Admin
-
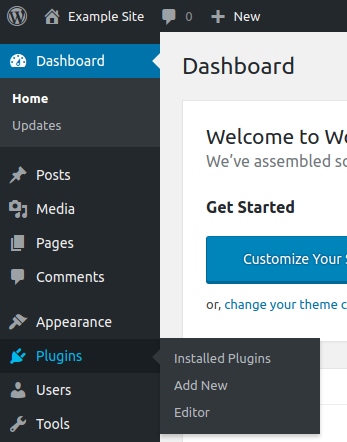
Click on Plugins
-

Click on Add New
-
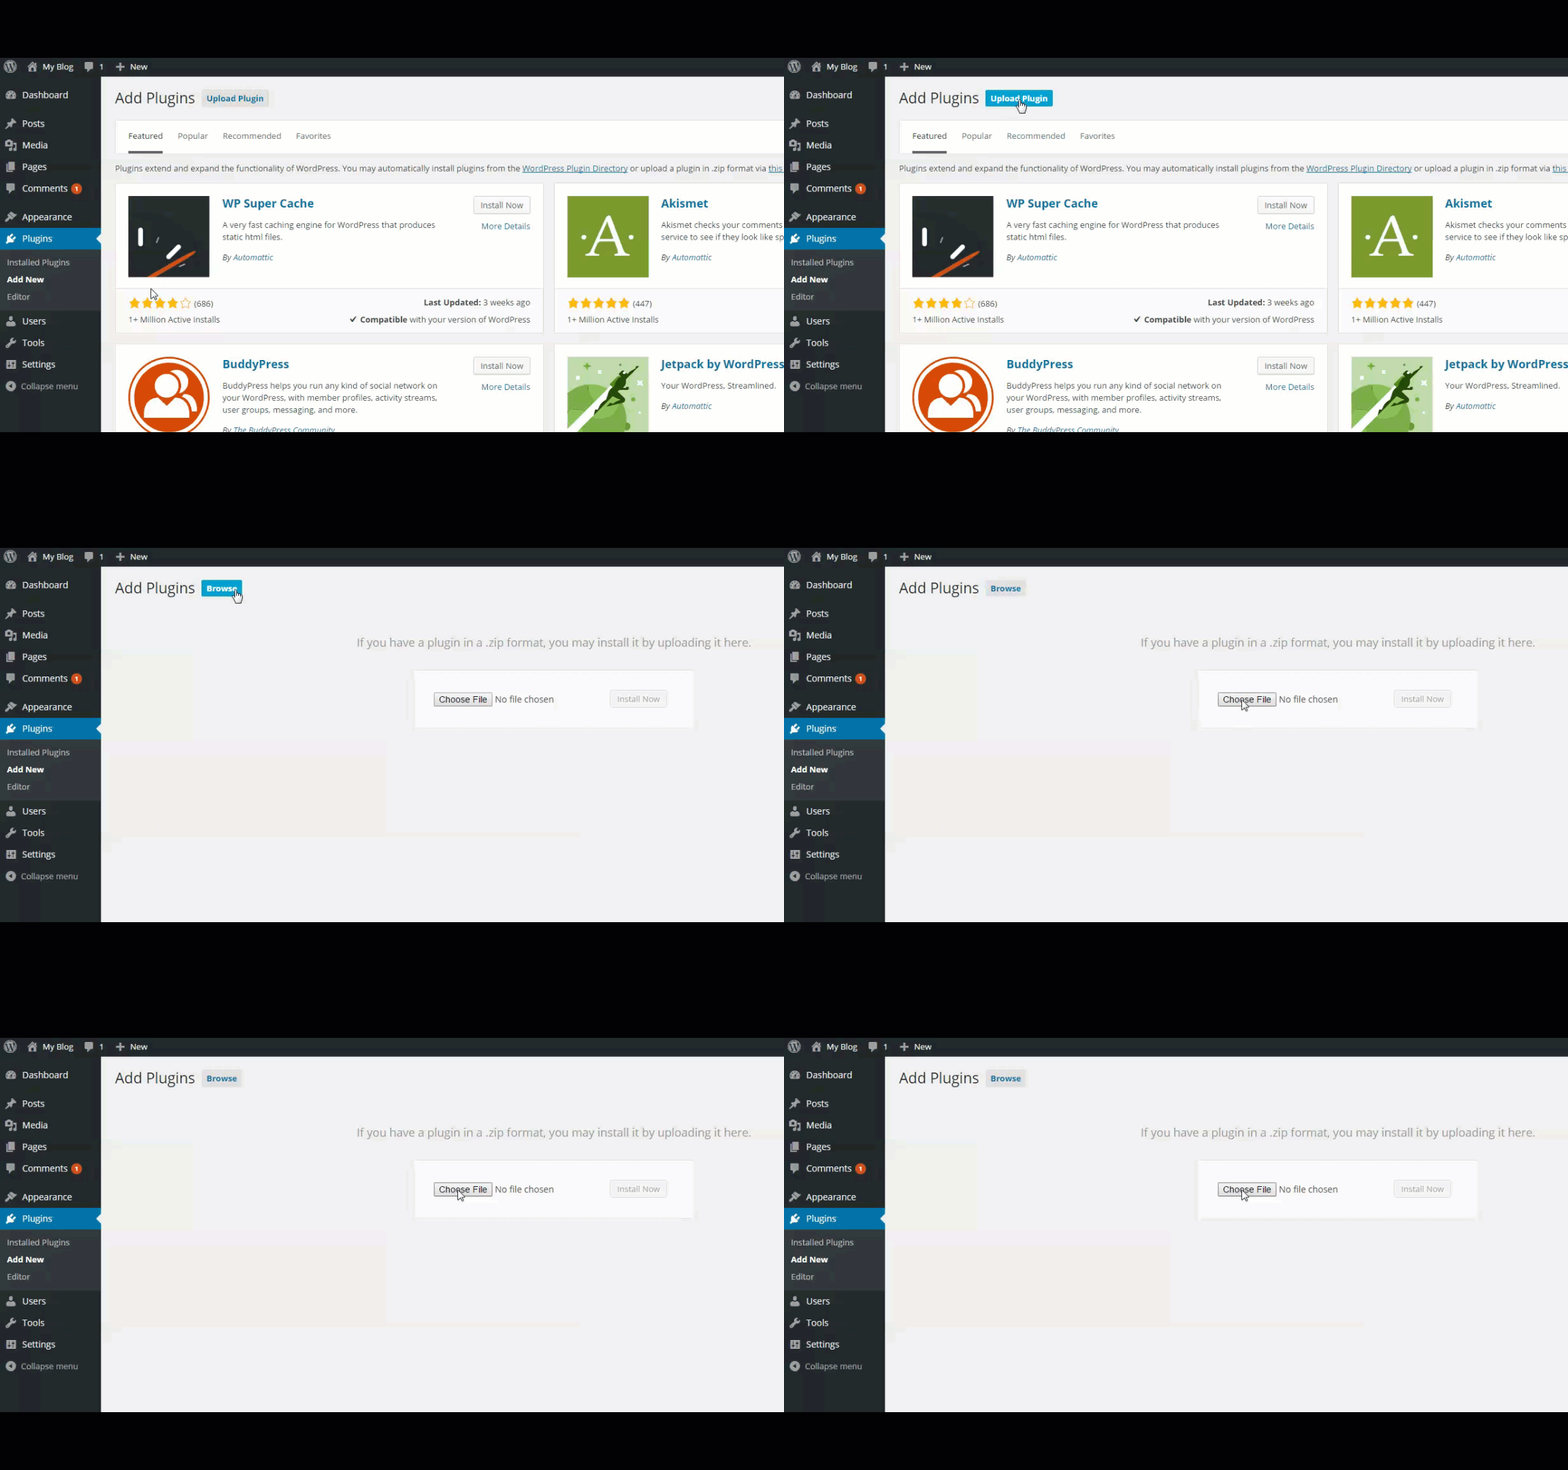
Click on Upload Plugin. You will need to recall the location where you saved the file from above. Upload the plugin, then install it.
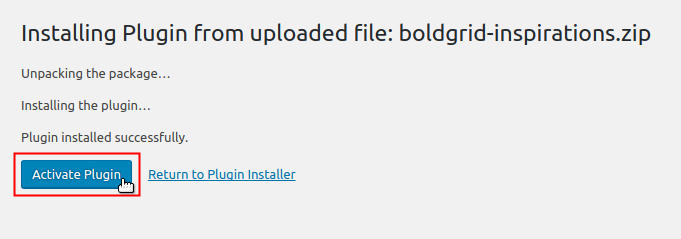
When the plugin has been installed, click on Activate Plugin in order to enable it.
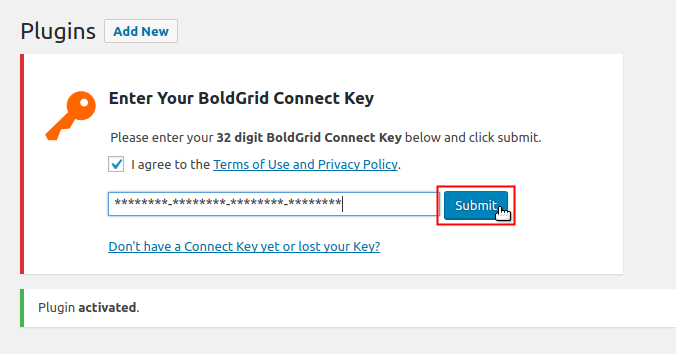
When the plugin installation and activation are completed you will see an option to enter your Connect Key. Copy and paste the Connect Key from Step 4 above.
-

When the installation completes you will be given the option to load another component. Click to check the checkboxes, then click on the Install button
Congratulations! You now know how to manually install BoldGrid into an existing WordPress installation. For more information on all things BoldGrid, check out the official BoldGrid Support Center.

We value your feedback!
There is a step or detail missing from the instructions.
The information is incorrect or out-of-date.
It does not resolve the question/problem I have.
new! - Enter your name and email address above and we will post your feedback in the comments on this page!