Changing Your File Storage Location in Concrete5
The previous guide in our working with images and videos in concrete5 series guided you in using a custom iphone bookmark thumbnail. In this tutorial we will show you how to change your file storage location in Concrete5. When you upload files through the File Manager in Concrete5, by default those files are stored in a folder called files, located within the same folder that you installed Concrete5 in. You can change this folder location easily from the Concrete5 Dashboard.
How to Change Your File Storage Location:
- Login to your Concrete5 Dashboard.
- Roll your mouse over the Dashboard button on top, and click the option for System & Settings. This will bring up the System & Settings menu.
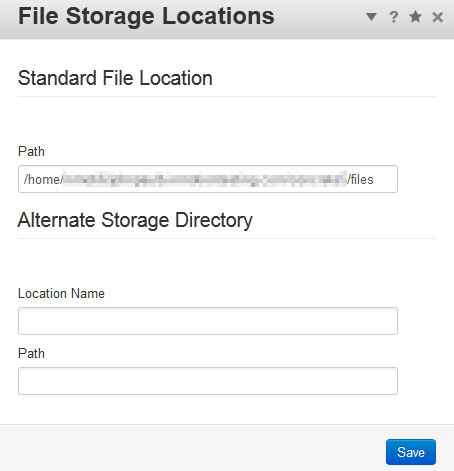
- Under the Environment section, select File Storage Locations. This will bring up the File Storage Locations menu.

The Standard File Location section lists the current path for file storage. - Under Location Name, create a name for your new Storage location, and enter the new location under the Path section. Once you have entered your selections, click the blue Save button on the bottom right. You will see a confirmation message stating "File storage locations saved."
Congratulations, you have changed your File Storage Location in Concrete5!
Continue to the next Concrete5 series, which will cover adding navigation.
Did you find this article helpful?
Tweet
Help Center Login
Working with Images and Video in Concrete5
Related Questions
Here are a few questions related to this article that our customers have asked:
Ooops! It looks like there are no questions about this page.
Would you like to ask a question about this page? If so, click the button below!

We value your feedback!
There is a step or detail missing from the instructions.
The information is incorrect or out-of-date.
It does not resolve the question/problem I have.
new! - Enter your name and email address above and we will post your feedback in the comments on this page!