Installing Opencart 1.5
OpenCart 1.5 is one of the newest an most popular open source solutions for ecommerce. The following installation guide assumes that you are at least familiar with navigating through your website files in your website installation, and setting up a MYSQL database using the Cpanel interface options found in Web Hosting Hub's hosting service. If you need more information on how to use FTP or the File Manager in the Cpanel, please review the following links:
Using the File Manager- Go to the Opencart website and then download the installation file by clicking DOWNLOAD
- Using the FTP client OR the Cpanel File Manager, navigate to the location that you intend to use to run the OpenCart store. If you intend to use it with your primary domain, then you need to go to the public_html folder. If your desired URL will be something like "http://mywebsite/store" then you will need to move to the folder where you will be uploading the files for the installation. In the example above, the folder you would be opening is the STORE folder.
- You can then use an FTP client or File manager to upload the file. Note that the file that you have uploaded is a zipped file. You can either unzip the file on your desktop system or select it in the File manager and then unzip the file.
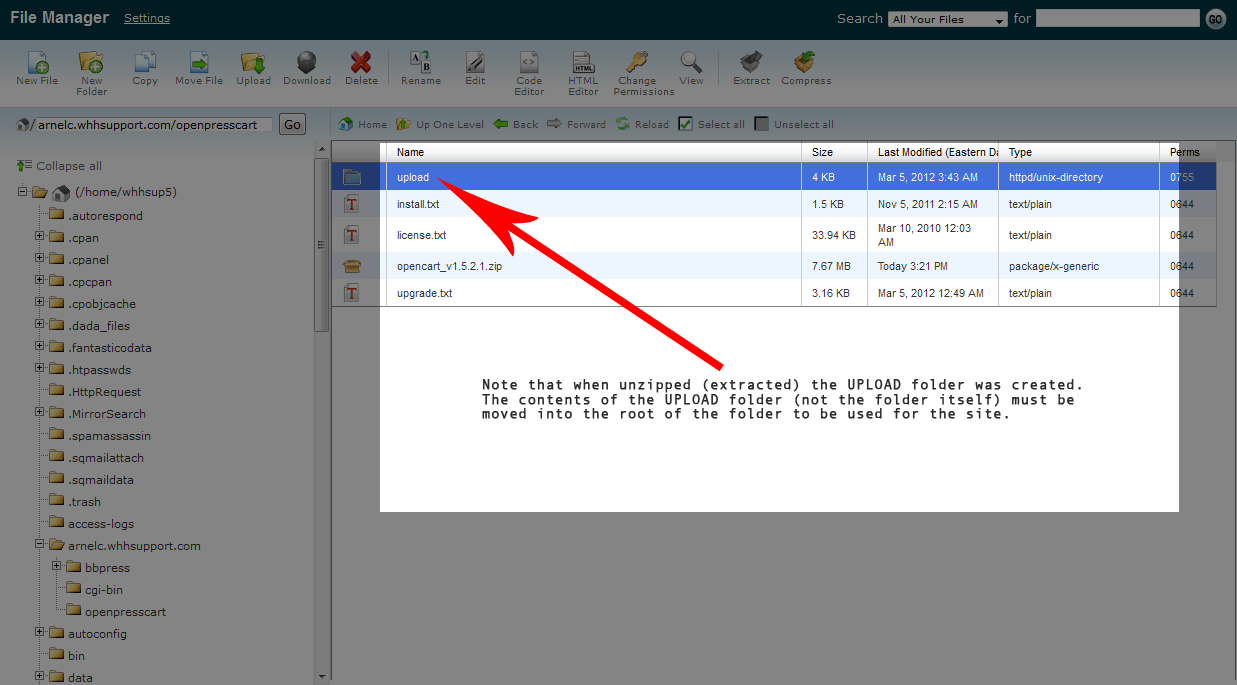
- Opencart 1.5 creates an UPLOAD folder which will be the location of the files for the installation. You may need to move the files OUT of the folder and into the actual installation folder that you are using. For example: You may have uploaded the files into the PUBLIC_HTML folder, but upon EXPANDING/UNZIPPING the file, the Opencart installation files will be in an UPLOAD folder. So the path to the installation files would look like this:
/public_html/upload
You will need to use the File Manager or the FTP client to move the files so that they are no longer in the upload folder. The files must only be in the /public_html folder.
- The next portion of the installation involves the setup of the database file. This includes the creation go of the database file, the creation of the user and the assignment of the user to the created database. The following instructions will be shown as done from the MySQL Databases interface in the Cpanel. Your first step will be to login to the Cpanel, then go to the Database section and select the MySQL Databases icon. Create a database by putting a name in the "New Database" blank - note that it will start with a prefix based on your account user name for the Cpanel.
- Moving down the screen go to the User section and create a new user. The user name will also be prefixed by the Cpanel user name. SECURITY REMINDER - DO NOT USE YOUR USER NAME AND PASSWORD USED FOR YOUR WEB HOSTING ACCOUNT. Make sure to write down both the database name, user name and password so you don't forget it.
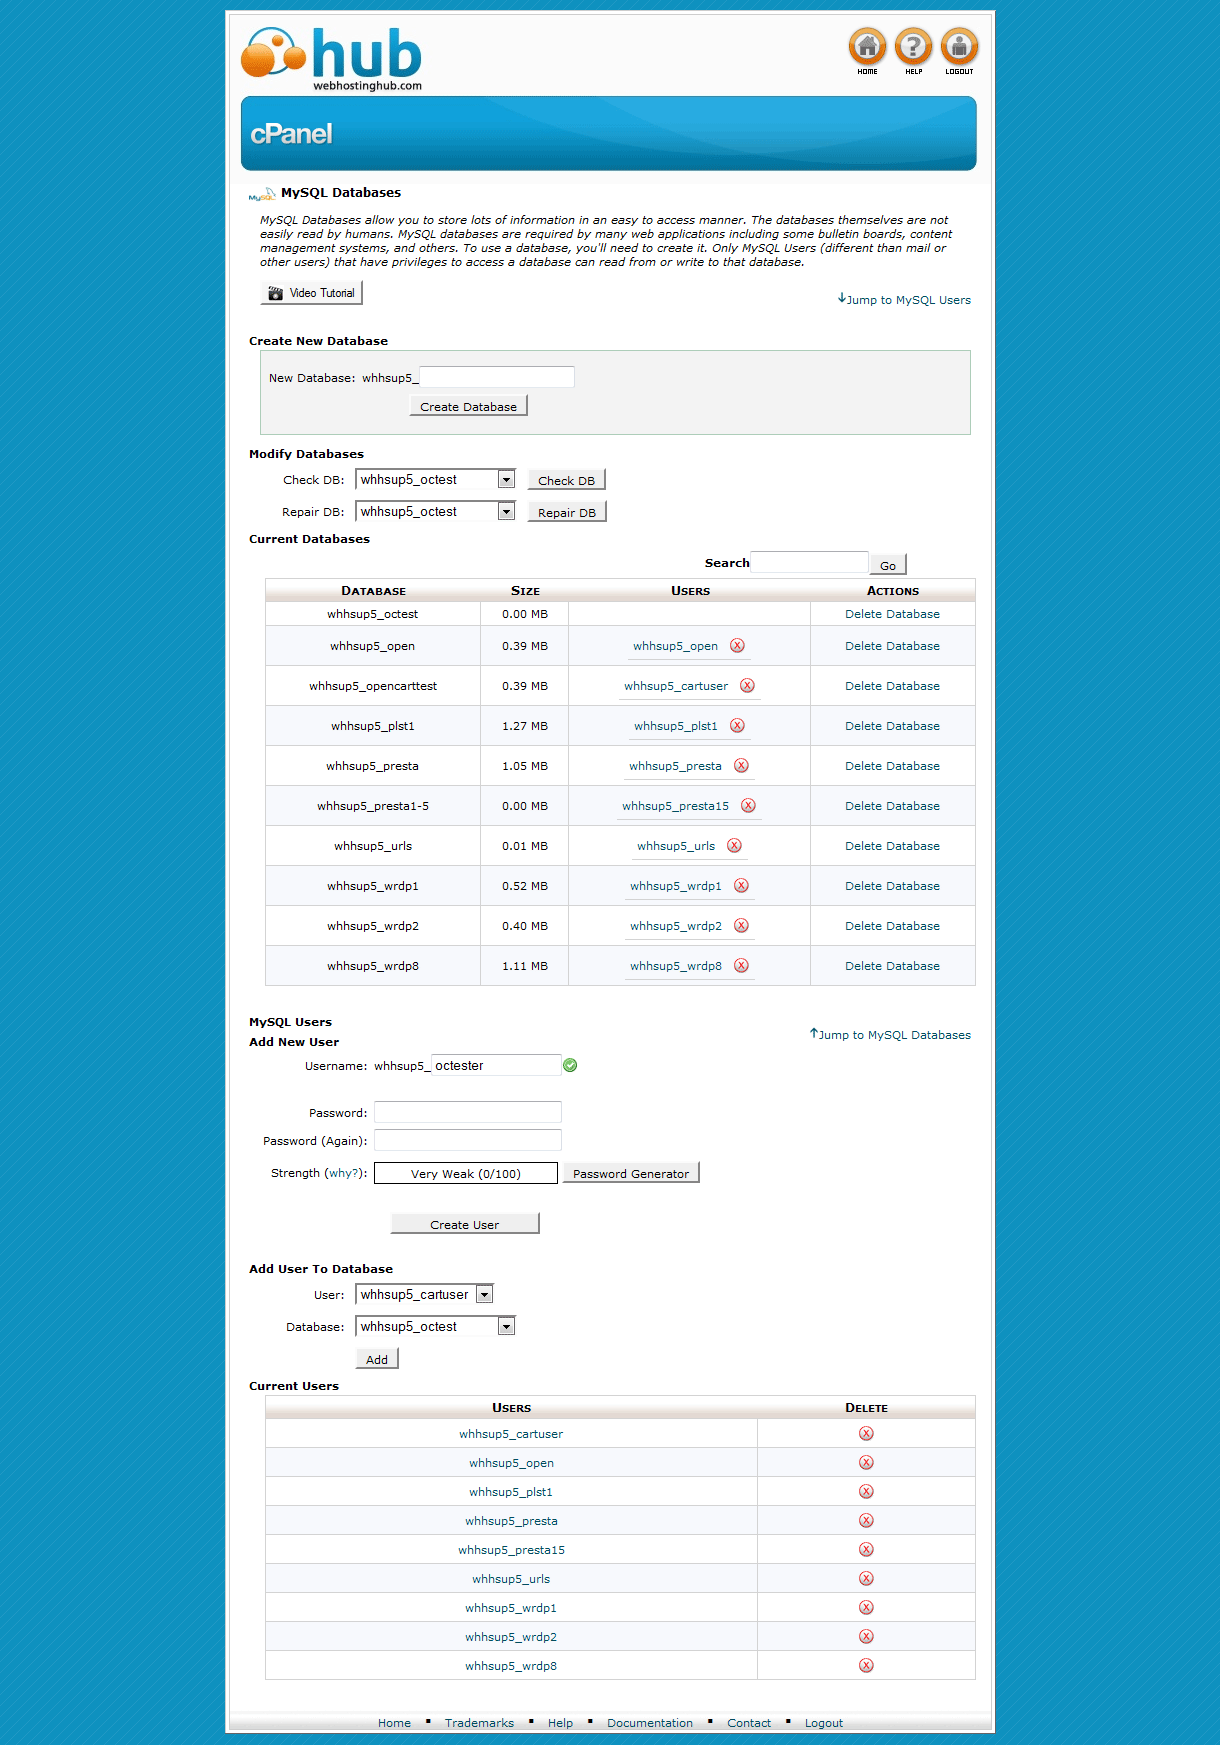
- Next, select the user from the dropdown menu and the database that you created earlier. ASSIGN the user to the database that you created. When you assign the user, you will have an option to select the rights for the user. Typically, just assign them all. This will complete your database setup
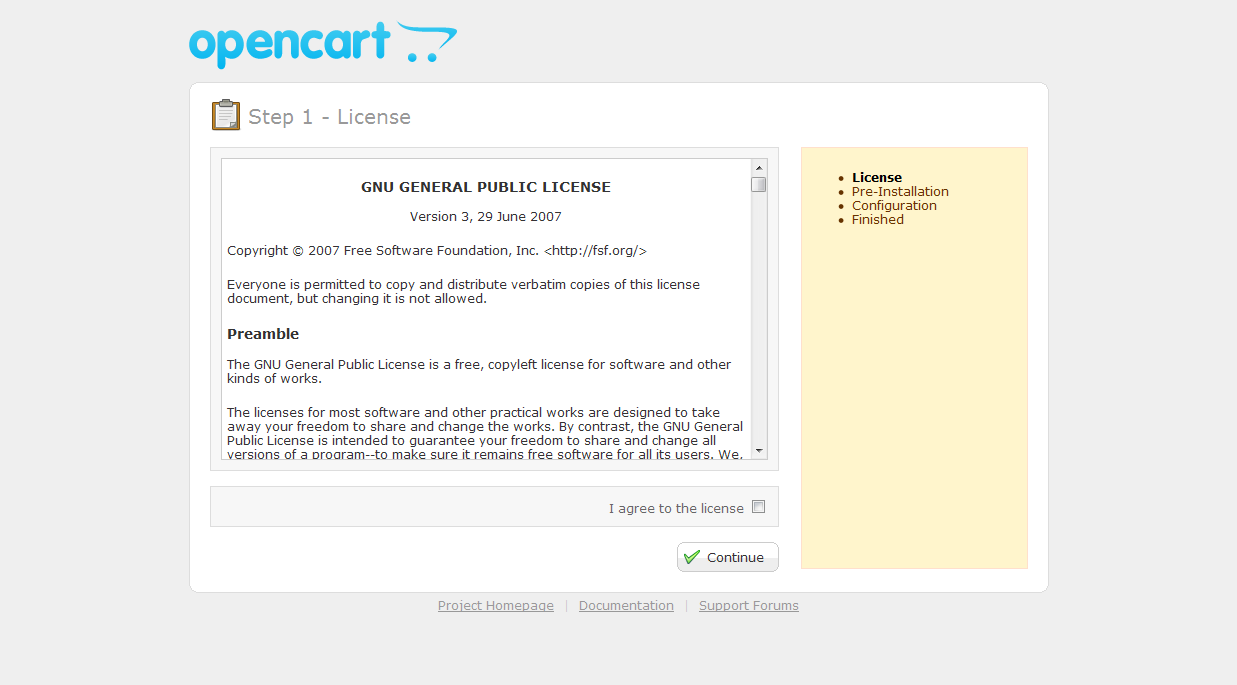
- The rest of the instructions will be based on screenshots directly from the OpenCart 1.5 installation. Go to the URL that you are using for the store home page and follow the onscreen instructions. Your very first step is to read and then agreee to the license
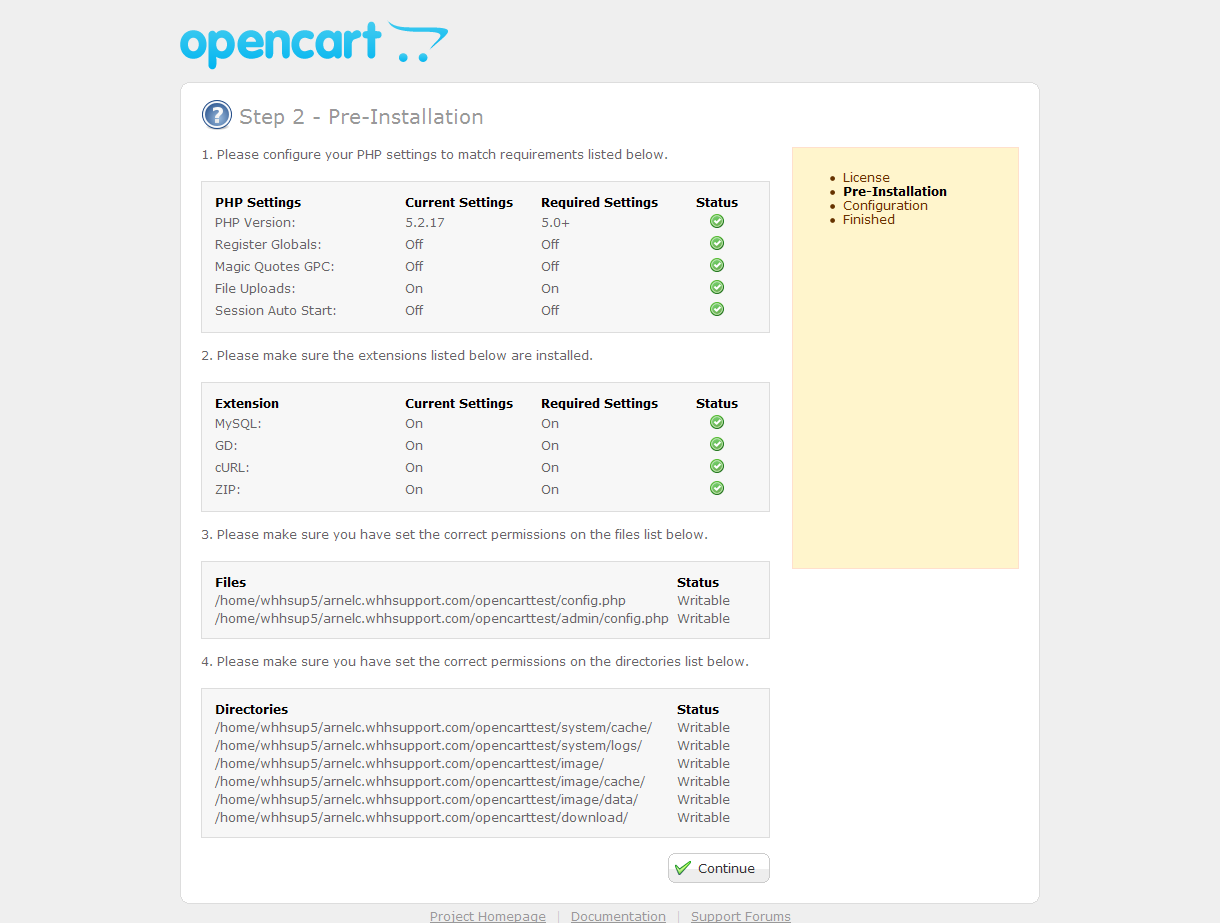
- Check to see that all requirements are met and files/folders are writable. You will see it noted here if something is not correct
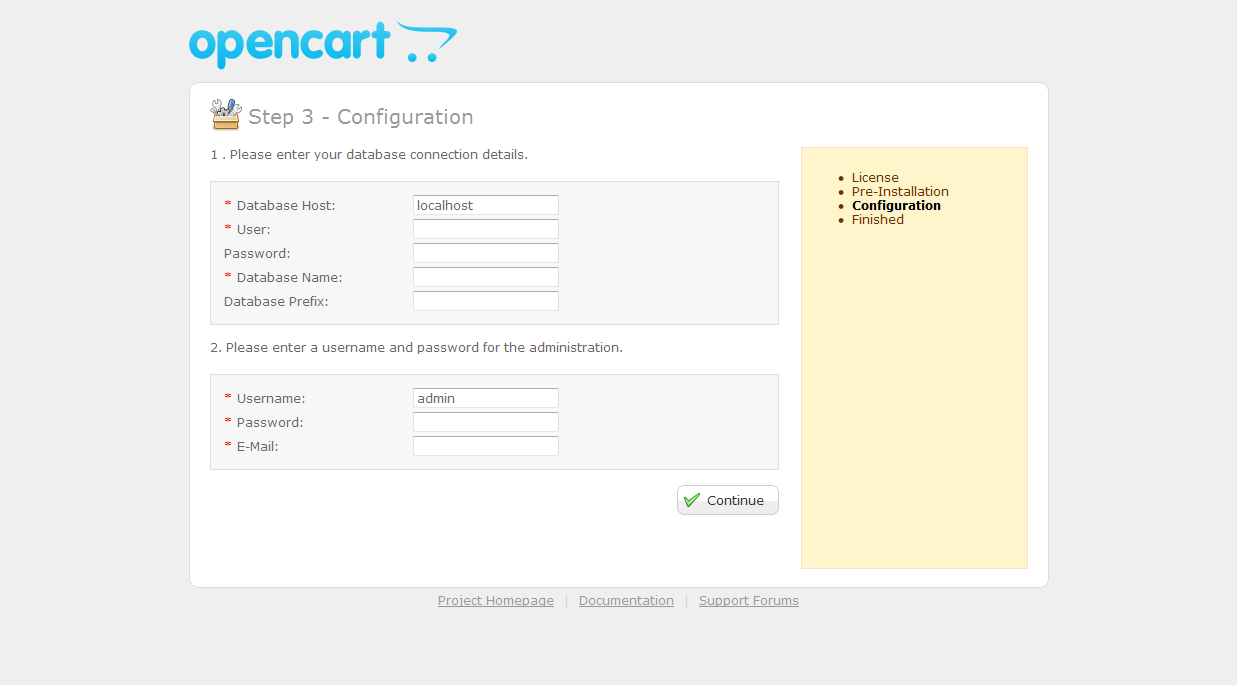
- Per the database portion of the install, use the information you used to create a database user to fill in the blanks. Note that the default setting for the database host is localhost. This is normally already filled in for you. The second part of this page asks for you to fill in the administrator name and password you wish to use to login (as an administrator).
- The last step is to confirm that you have completed and that you need to DELETE the Install folder
This completes the installation of OpenCart 1.5! At present the installation can only be done manually with Web Hosting Hub, but hopefully this guide has provided you a solid understanding of how best to accomplish this installation. Please refer to this link.

We value your feedback!
There is a step or detail missing from the instructions.
The information is incorrect or out-of-date.
It does not resolve the question/problem I have.
new! - Enter your name and email address above and we will post your feedback in the comments on this page!