Adding Product Customization Fields in PrestaShop 1.5
Prestashop allows you to add customization fields that customers can use to add text or upload files. The following tutorial will show you how to add these fields for each product where you require this option.
Managing Product Customization fields in PrestaShop 1.5
- Login to the PrestaShop 1.5 Administration Panel as an Administrator
- Go to the menu bar and hover over CATALOG until the drop-down menu appears. Click on PRODUCTS
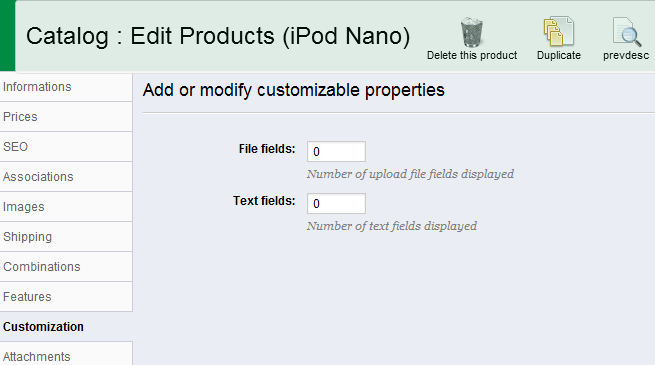
- If you are managing an existing inventory, you will see a list of your products. Select one of your products and then click on EDIT. Otherwise, select ADD NEW from the top right hand side of the screen. Once you have either selected a product or created a new one, you will see a menu strip on the lefthand side. Select CUSTOMIZATION and you will see the following screen:

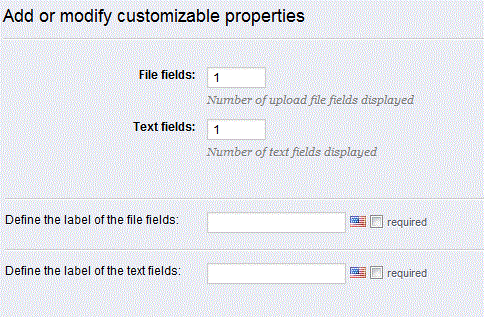
- If you wish to add a field or fields select the field next to the corresponding field you wish to change and add a number. If you add a field, you will see the following screen:

Note that when you add the field for either type, you will get a LABEL field that you will need to add. This label field will be required for every langugage you are using. You can also select if the label is required or not by checking on the box next to each field labeled "required." - Once you have added the name of the field(s), then select SAVE in the top right hand corner in order to save your entries.
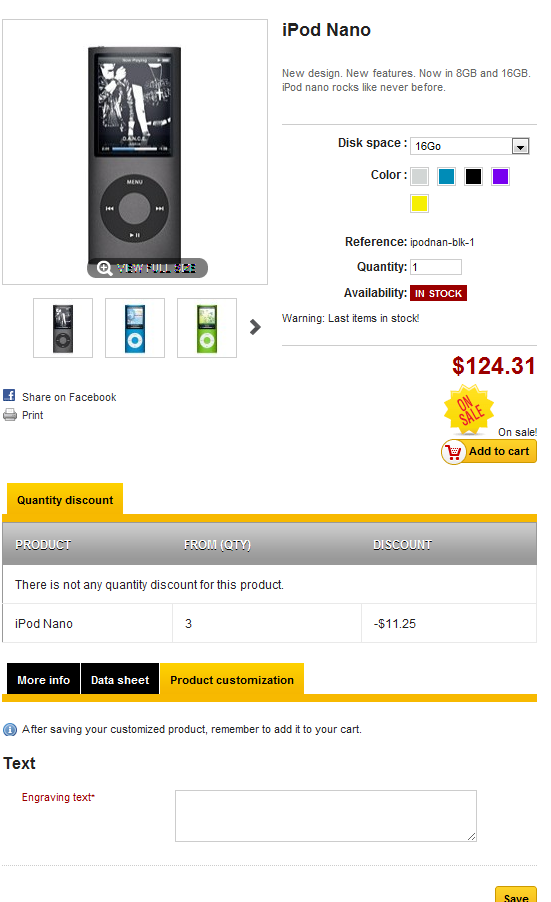
When Customization fields are added, customers will have the field available to them in the storefront. These fields will be required to be filled before a customer can add the product to their cart. Here's a sample screenshot:
Did you find this article helpful?
Tweet
Help Center Login
Working with Products in PrestaShop 1.5
Related Questions
Here are a few questions related to this article that our customers have asked:
Ooops! It looks like there are no questions about this page.
Would you like to ask a question about this page? If so, click the button below!

We value your feedback!
There is a step or detail missing from the instructions.
The information is incorrect or out-of-date.
It does not resolve the question/problem I have.
new! - Enter your name and email address above and we will post your feedback in the comments on this page!