How to Install the Zend Framework
In our previous article, we gave a brief overview of the Zend Framework. In this article we'll walk through installing Zend Framework on your account.
Downloading and Uploading the Zend Framework Package
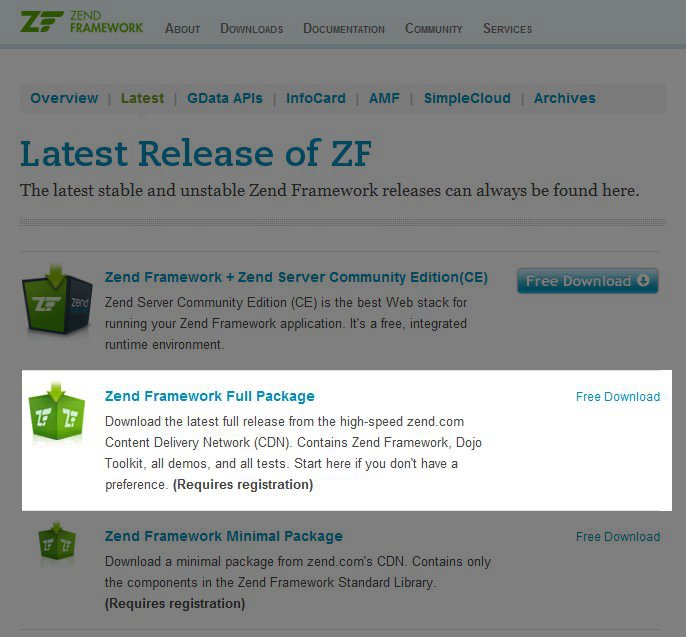
- In order to download the Zend Framework, you will first need to create an account at zend.com. Once you have registered for your account with Zend, you will want to download the Full Package of the latest version.
- Using either the cPanel File Manager or an FTP program, upload the Zend Framework package to your public_html directory.
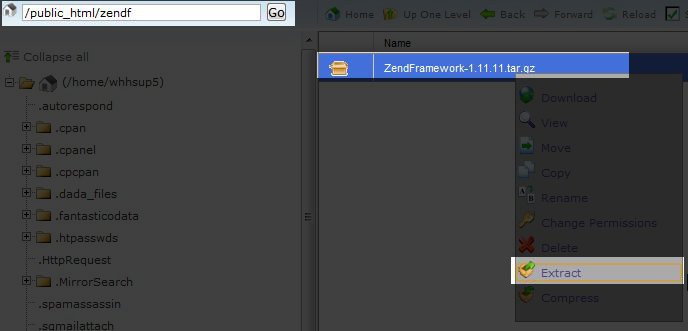
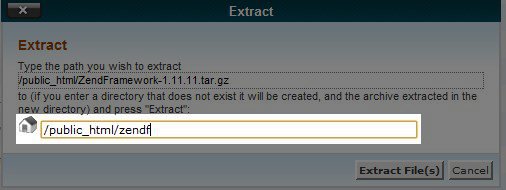
- Extract the Zend package and create a new directory by typing the new directory name into the text box in the Extract dialog Window. We'll name ours zendf in this example.
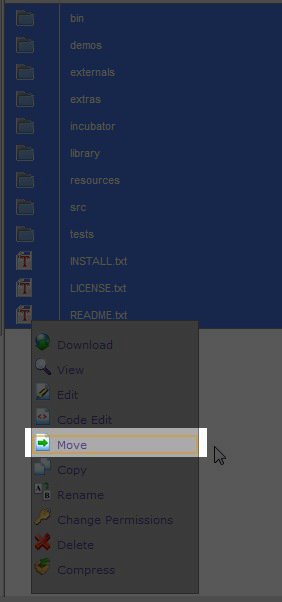
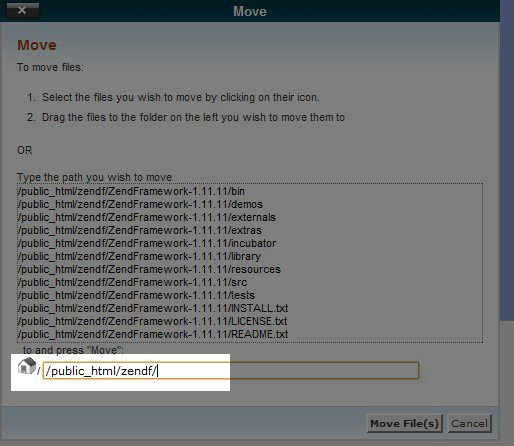
- When we extract these files another new folder is automatically created named ZendFramework-1.11.11. To simplify the path we'll need for the next step, we'll move all the files and folders inside that folder up one level so they are just under public_html/zendf.
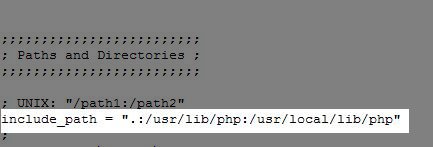
- Next, we need to add the path to the Zend Framework library to the beginning of our include path in our php.ini file so our PHP application will know where the library is. If you need more information on the php.ini file, please see our article on updating your local PHP settings. The full path to that library will be: /home/whhsup5/public_html/zendf/library. Make sure when you add this path to your php.ini file that you use your username instead of whhsup5 and if you named your Zend Framework folder anything other that zendf, substitute the correct folder name there as well.
- If your php.ini file has not been set to be recursive, please make sure to do that now. For more information on how to set the php.ini file to be recursive, please see our article How Do I Make My php.ini File Recursive.
Make sure you download the Zend Framework package for Linux.


Now you're ready to get started using the Zend Framework for PHP development. If you would like do some testing to verify the Zend Framework is installed correctly, please see our article on How to Test a Zend Framework Installation.
If you have any questions about installing Zend Framework, please feel free to submit your question in our Support Center Community.
Did you find this article helpful?
Tweet
Category
General Server Setup / Management
Help Center Login
Related Questions
Here are a few questions related to this article that our customers have asked:
Ooops! It looks like there are no questions about this page.
Would you like to ask a question about this page? If so, click the button below!

We value your feedback!
There is a step or detail missing from the instructions.
The information is incorrect or out-of-date.
It does not resolve the question/problem I have.
new! - Enter your name and email address above and we will post your feedback in the comments on this page!