How to set the image used for the banner in OpenCart 1.5
The image used for the Banner can vary depending on the layout design requirements. The following tutorial will guide you in setting the image used for the banner.
How to set the image used for the Banner
- Login to the Administration Dashboard as an Administrator
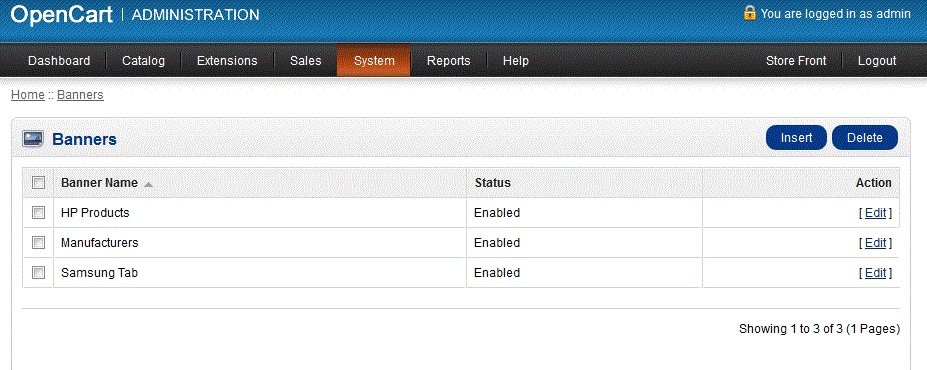
- Hover over SYSTEMS, then click on DESIGN and then select BANNERS. Then you will see the initial window for Banners appear as per below:

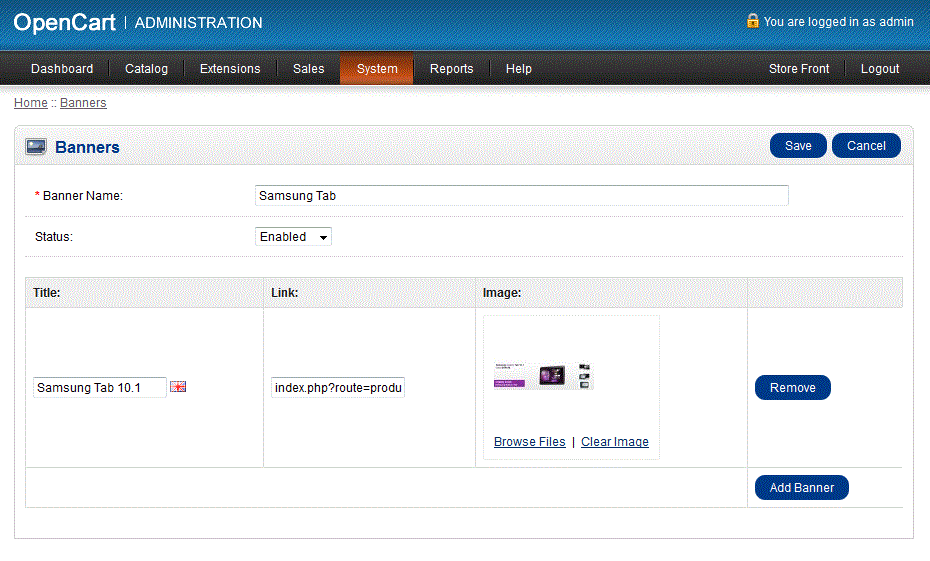
- Select the Banner name that you wish to use, or select INSERT in order to add a new Banner Name. Select EDIT at the right hand side in order to edit the details of the Banner.

- Select BROWSE FILES in order to choose the image that will be used for the Banner

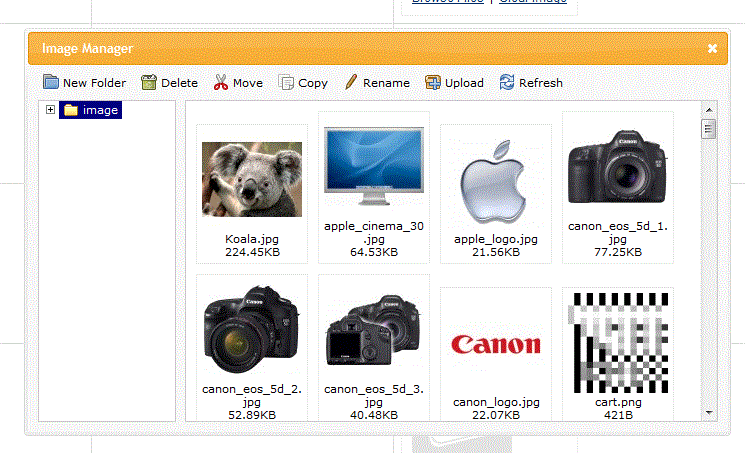
The IMAGE MANAGER which will open when you select BROWSE FILES, has several basic functions other than to simply select your image file:
NEW FOLDER - creates a new folder in the IMAGE folder
DELETE - delete image
MOVE - move file from one location to the next
COPY - copy image from one location to another
RENAME - rename image (does not change image extension)
UPLOAD - upload images into the IMAGE folder on server
REFRESH - refresh list to show changes (deleted, re-named, or added images) - Select UPLOAD to bring in a new file, or select an existing file for the browser. Remember that the file that you select should fit within the design template that you are working in
- Select the SAVE button in the top right hand corner in order to save your selection
The Banner image you select should match your advertising intentions or screens you intend to show your customer for communication of further information. In order to add more banners, you will need to work with the design layouts that are being used for the store.
Did you find this article helpful?
Tweet
Help Center Login
Customizing the Appearance of OpenCart
Related Questions
Here are a few questions related to this article that our customers have asked:
Ooops! It looks like there are no questions about this page.
Would you like to ask a question about this page? If so, click the button below!

We value your feedback!
There is a step or detail missing from the instructions.
The information is incorrect or out-of-date.
It does not resolve the question/problem I have.
new! - Enter your name and email address above and we will post your feedback in the comments on this page!